Connect Transaction to Shortcuts, step by step.
Four automations, with every screen along the way: first what to do in the Transaction app, then exactly how the shortcut should look, and finally the green banner when it works.
The screenshots are from iOS 27, in English. In another language Apple’s buttons have other names, but they sit in the same places. Transaction’s own actions have the same English names on every phone.
If any step fails, the shortcut stops silently. There is no message, and everything about that transaction is lost.
Read what makes it failApple Wallet, on your Main account
You tap to pay, and the transaction is created behind the scenes with the app closed. It is there the next time you open the app.
In the Transaction app
Open the menu, tap Settings, then Apple Pay Shortcut.
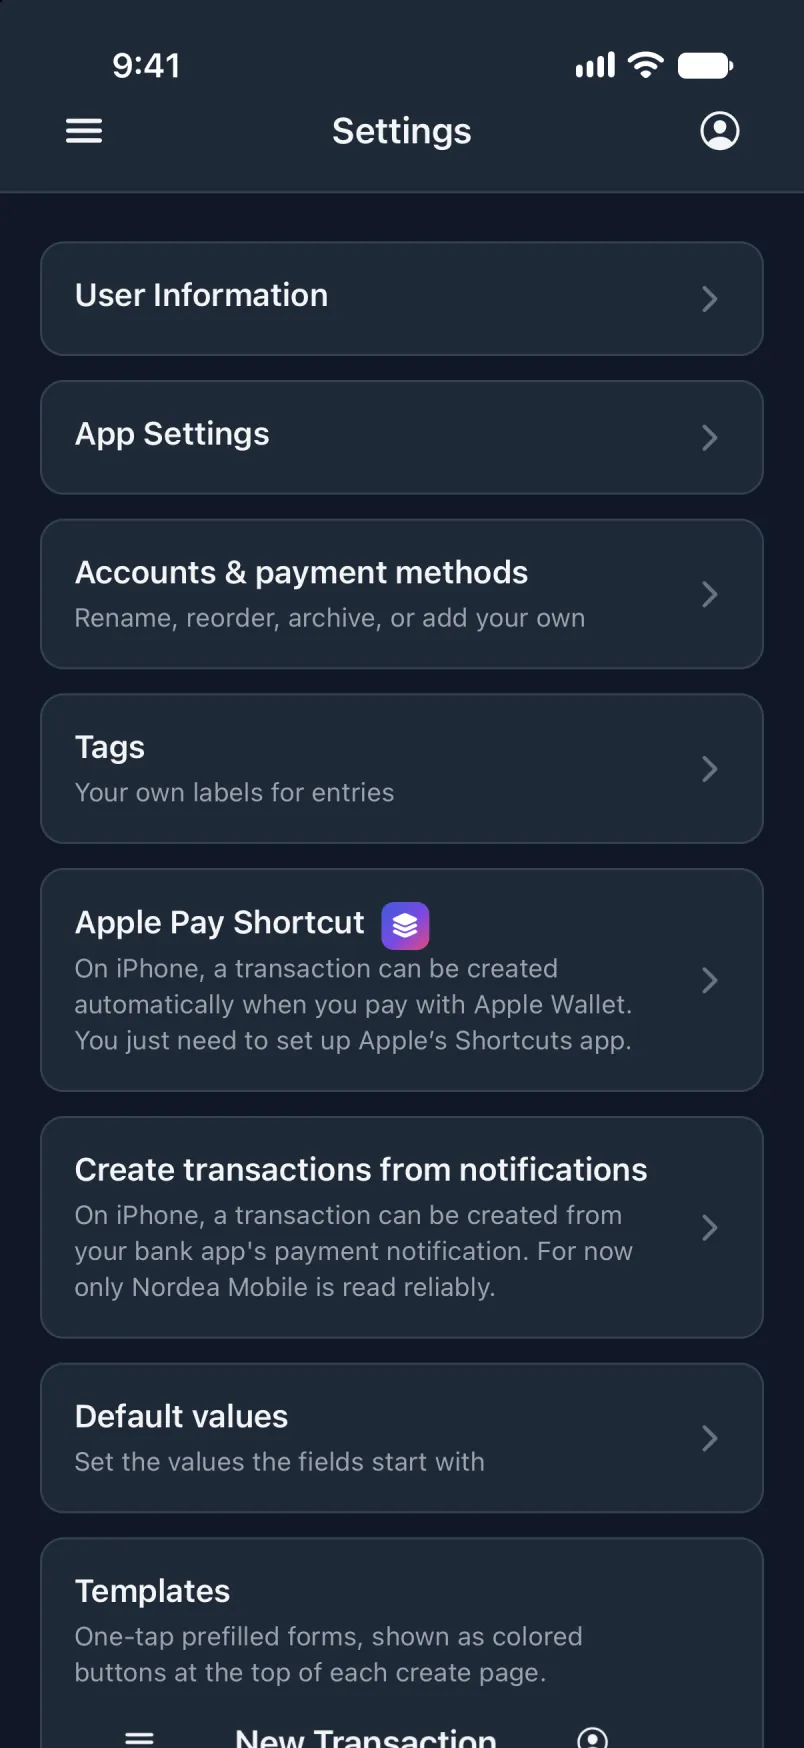
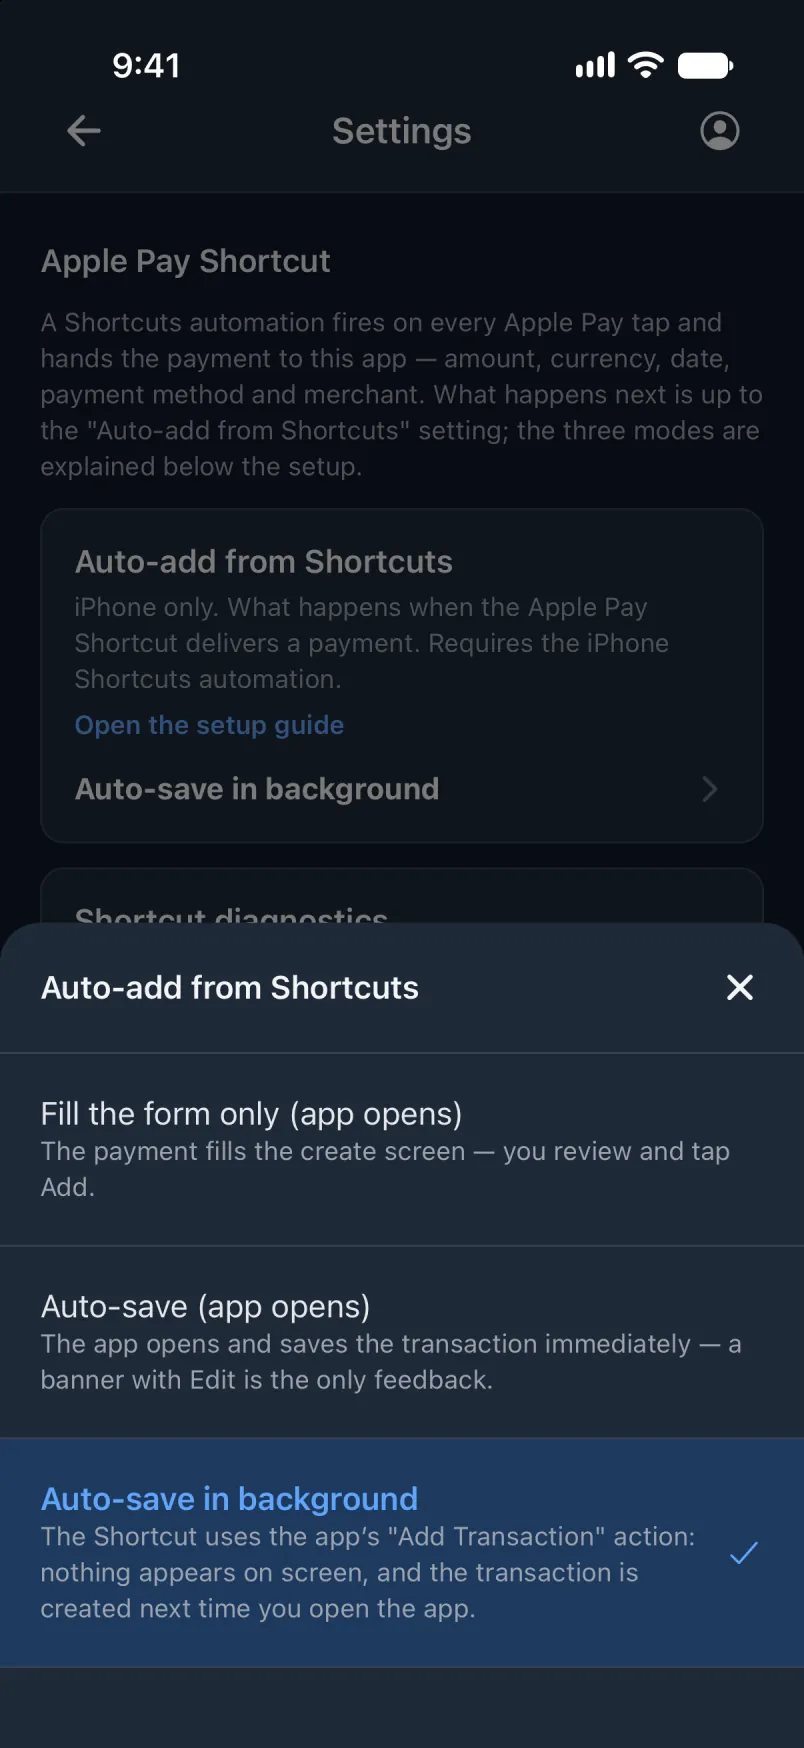
Under Auto-add from Shortcuts, choose Auto-save in background.
In Shortcuts
Open Shortcuts. Tap Library, then Automation, then the + button.
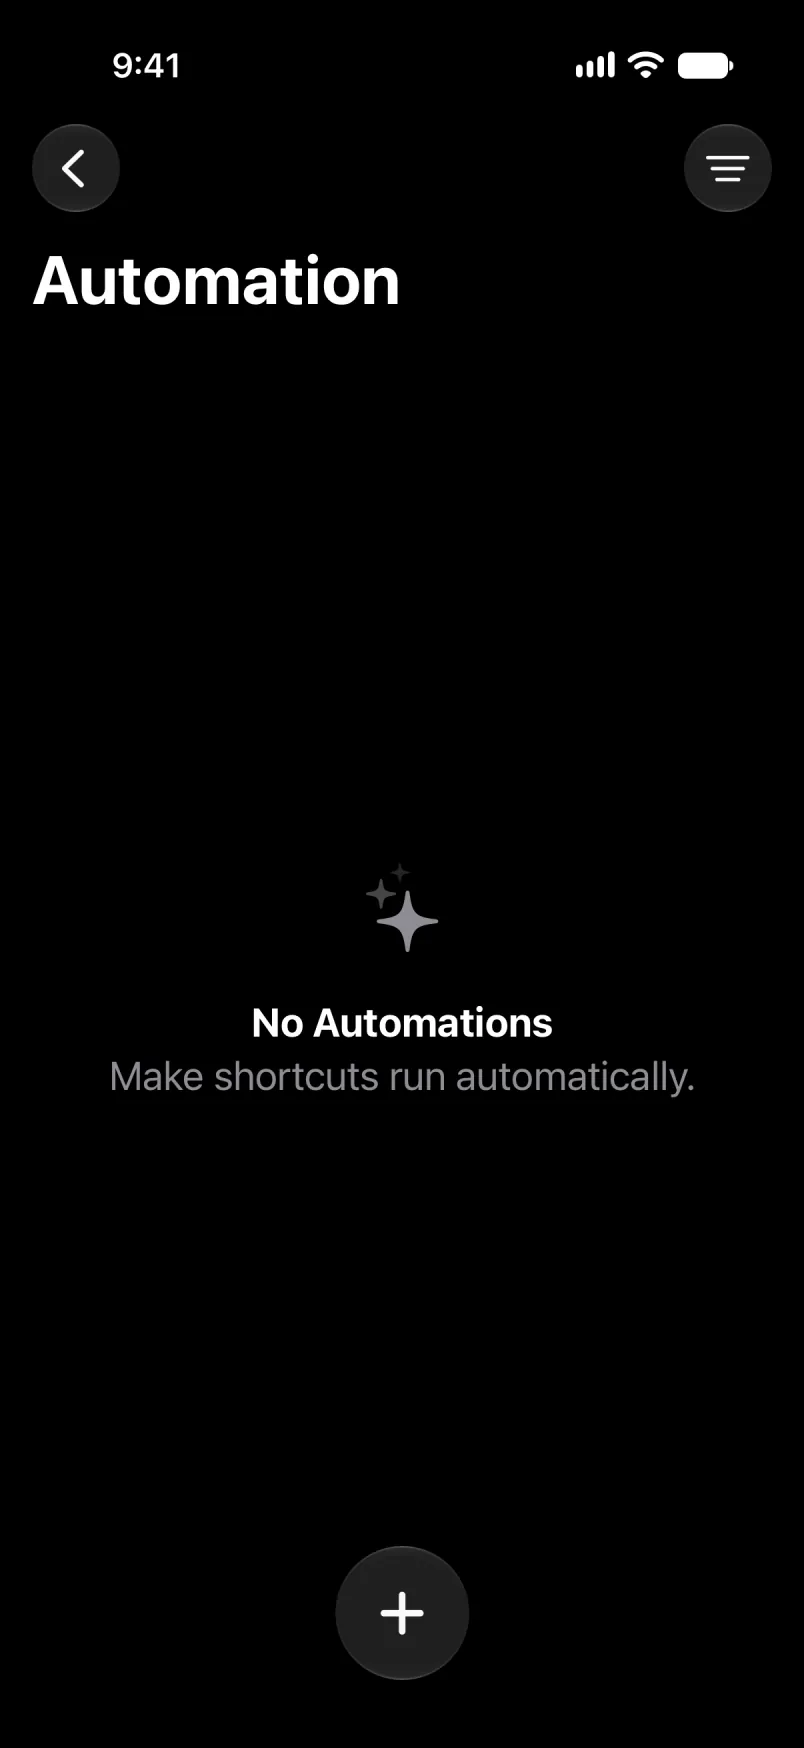
If it asks you to describe a shortcut, tap Edit at the top. Tap Search, then the blue Automation button.
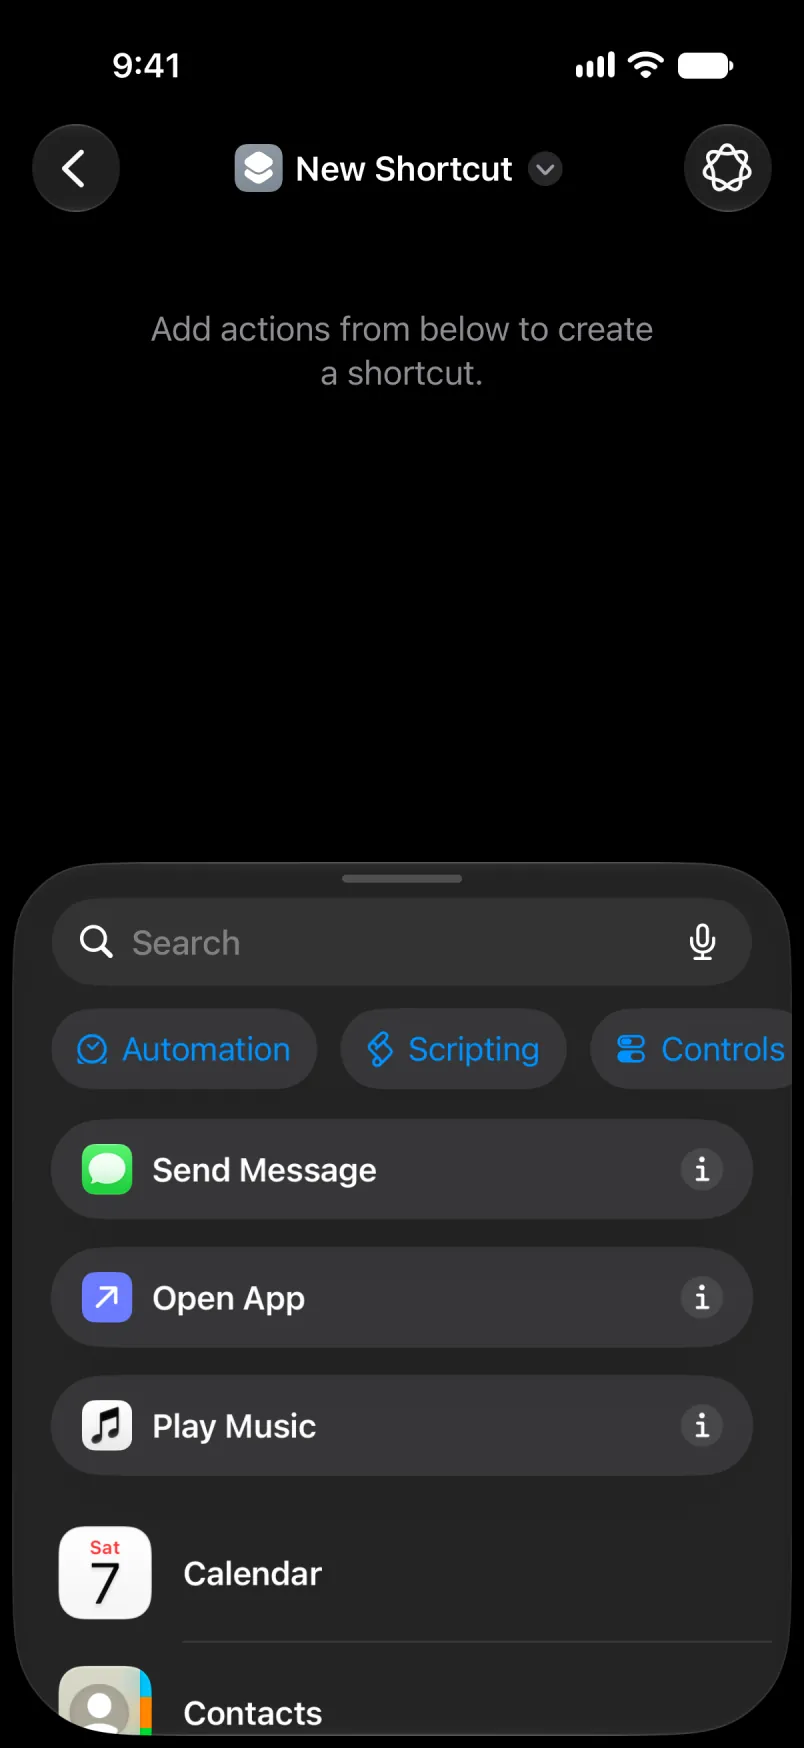
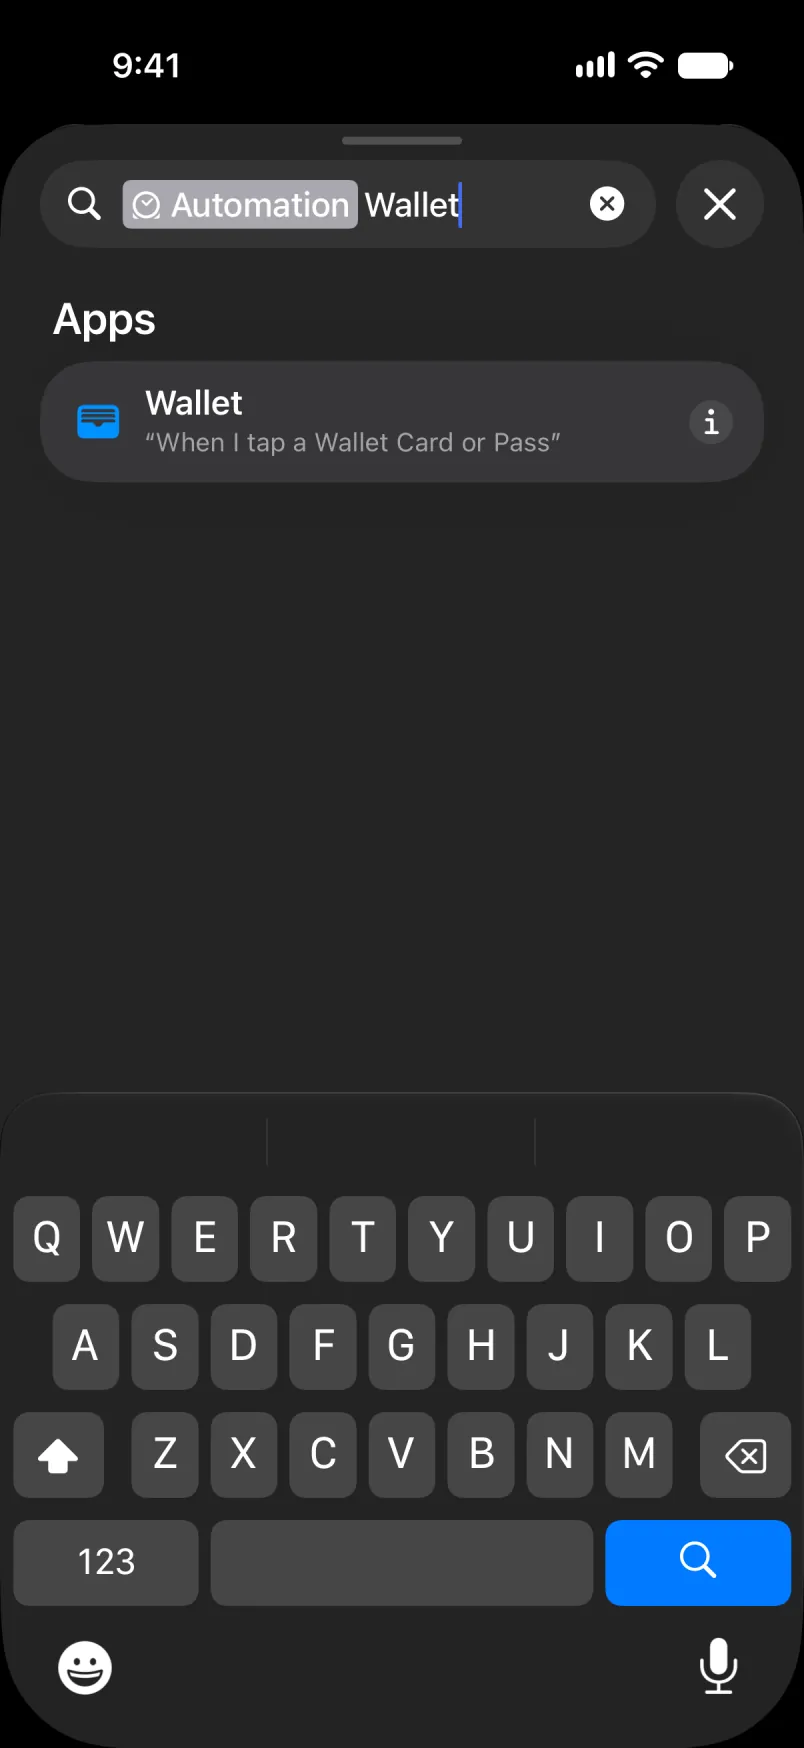
Type Wallet and tap it.
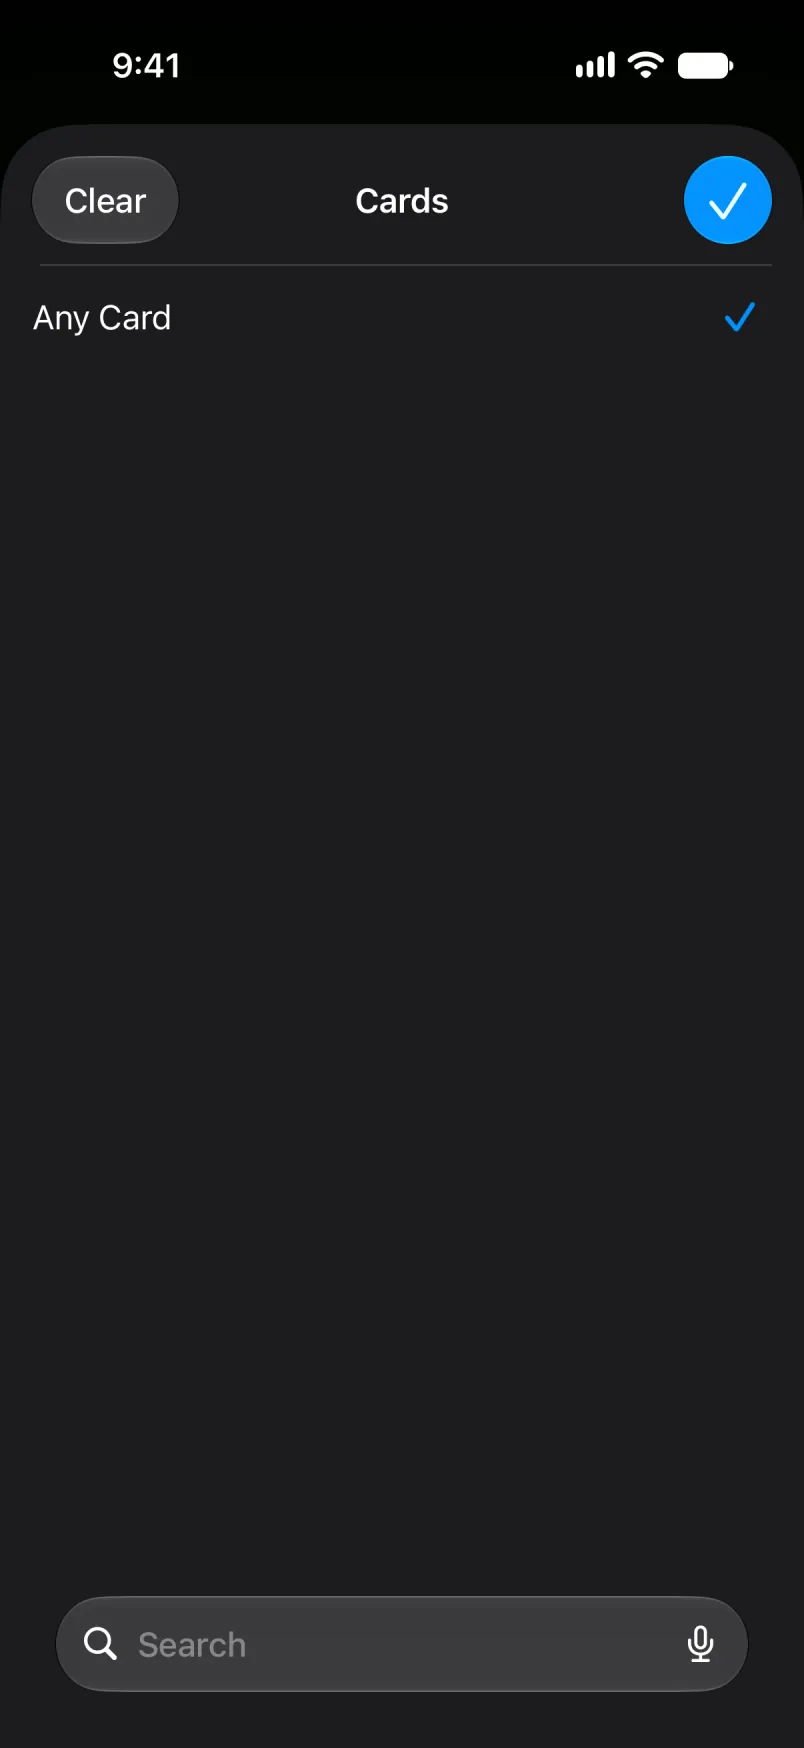
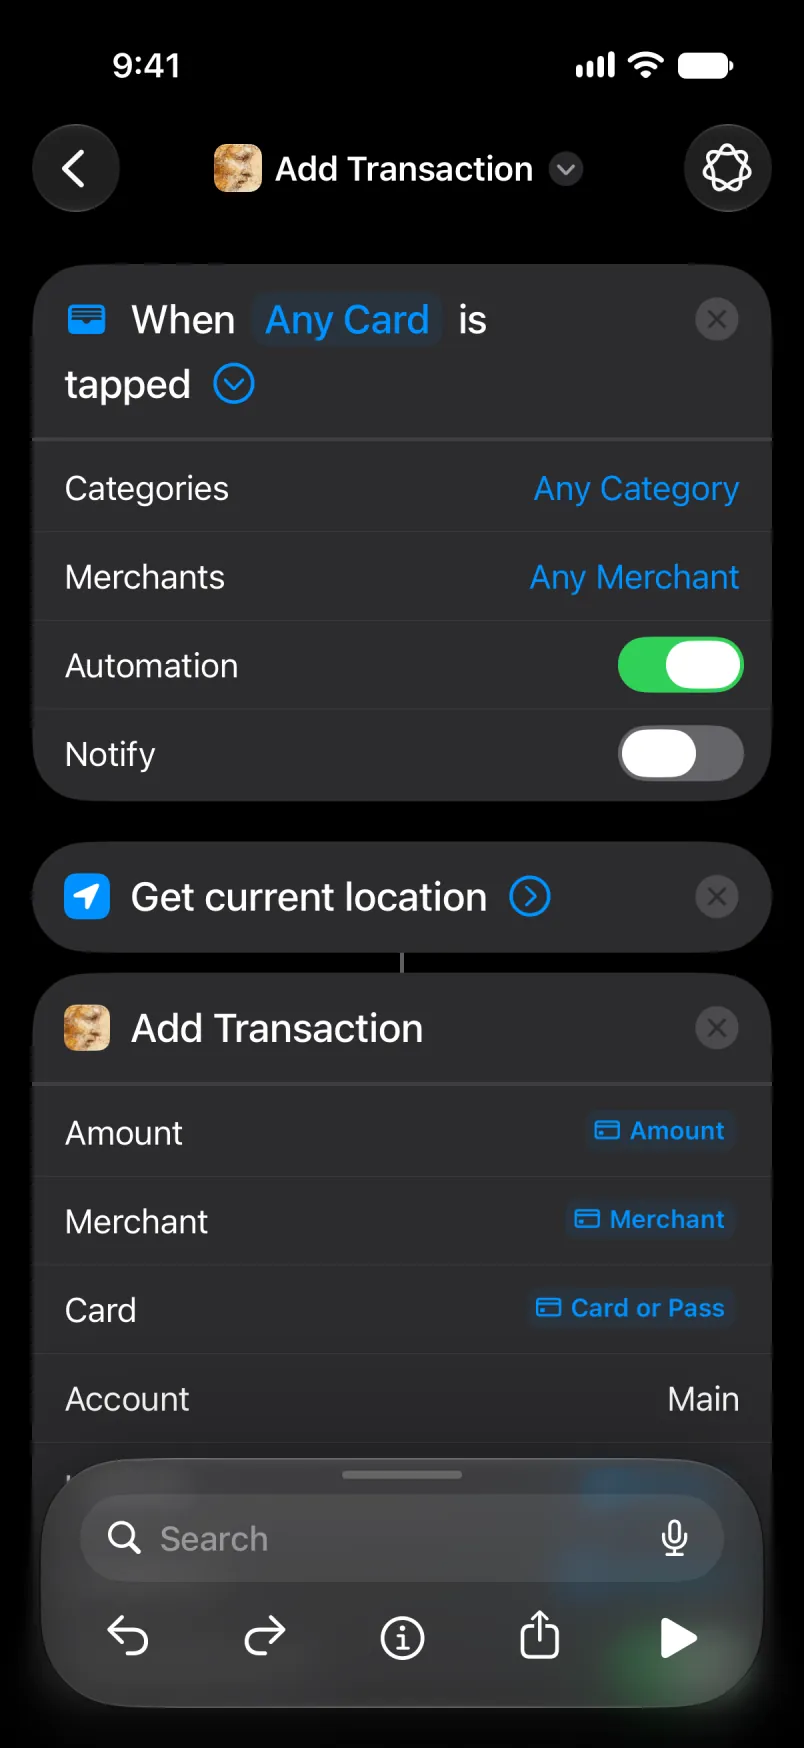
Tap Any Card and tick the card this automation is for. Your own cards are listed here. This test phone has none.
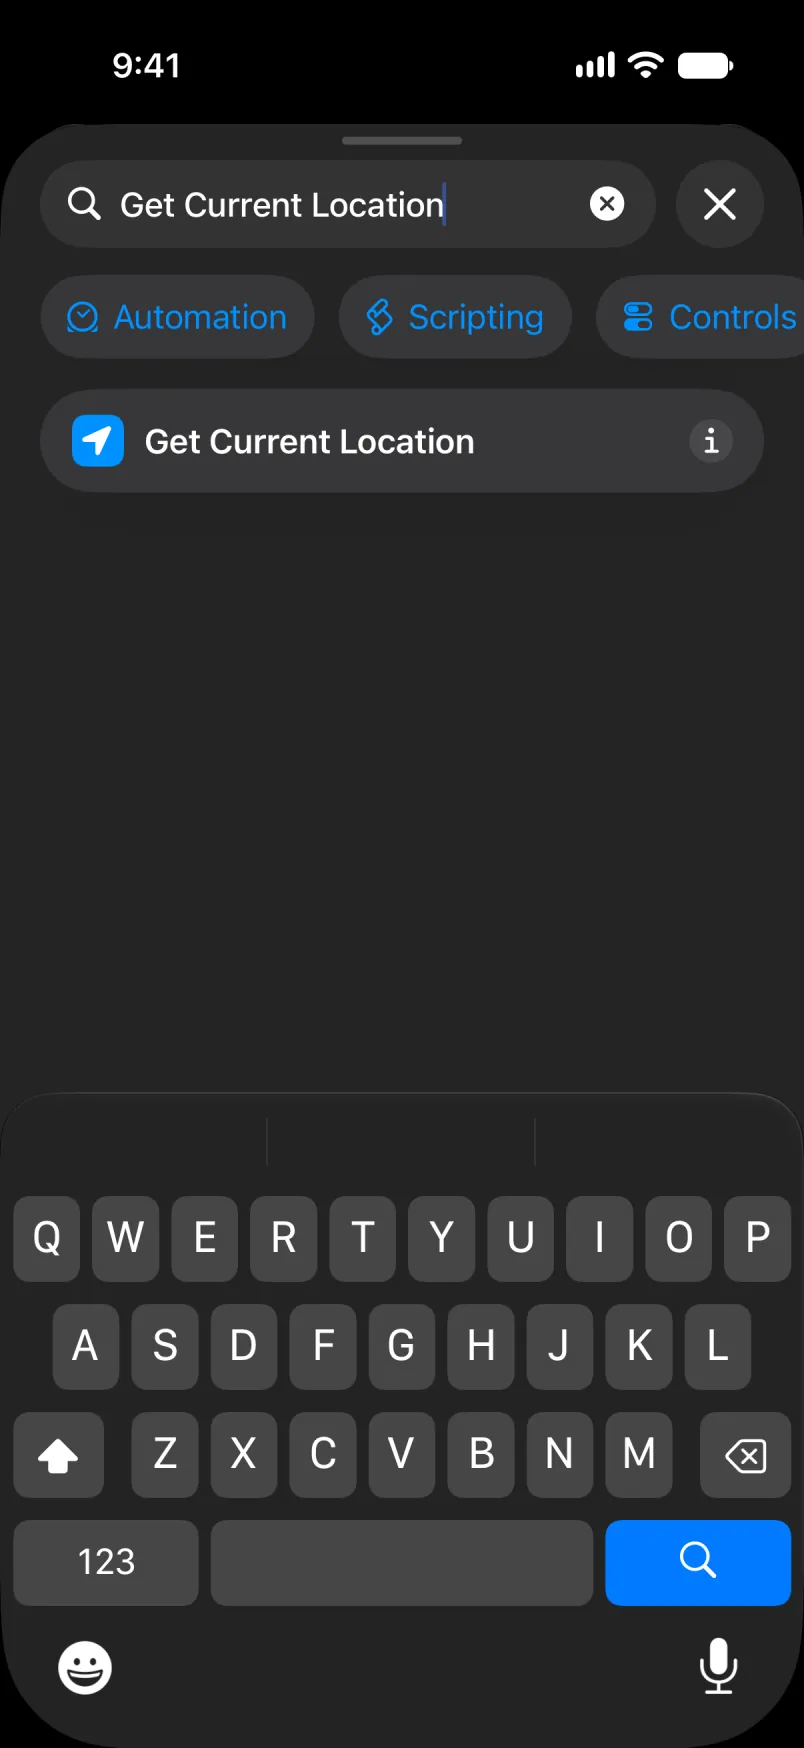
Tap Search, type Get Current Location and tap it. It has no settings.
Search for Add Transaction and tap the first one.
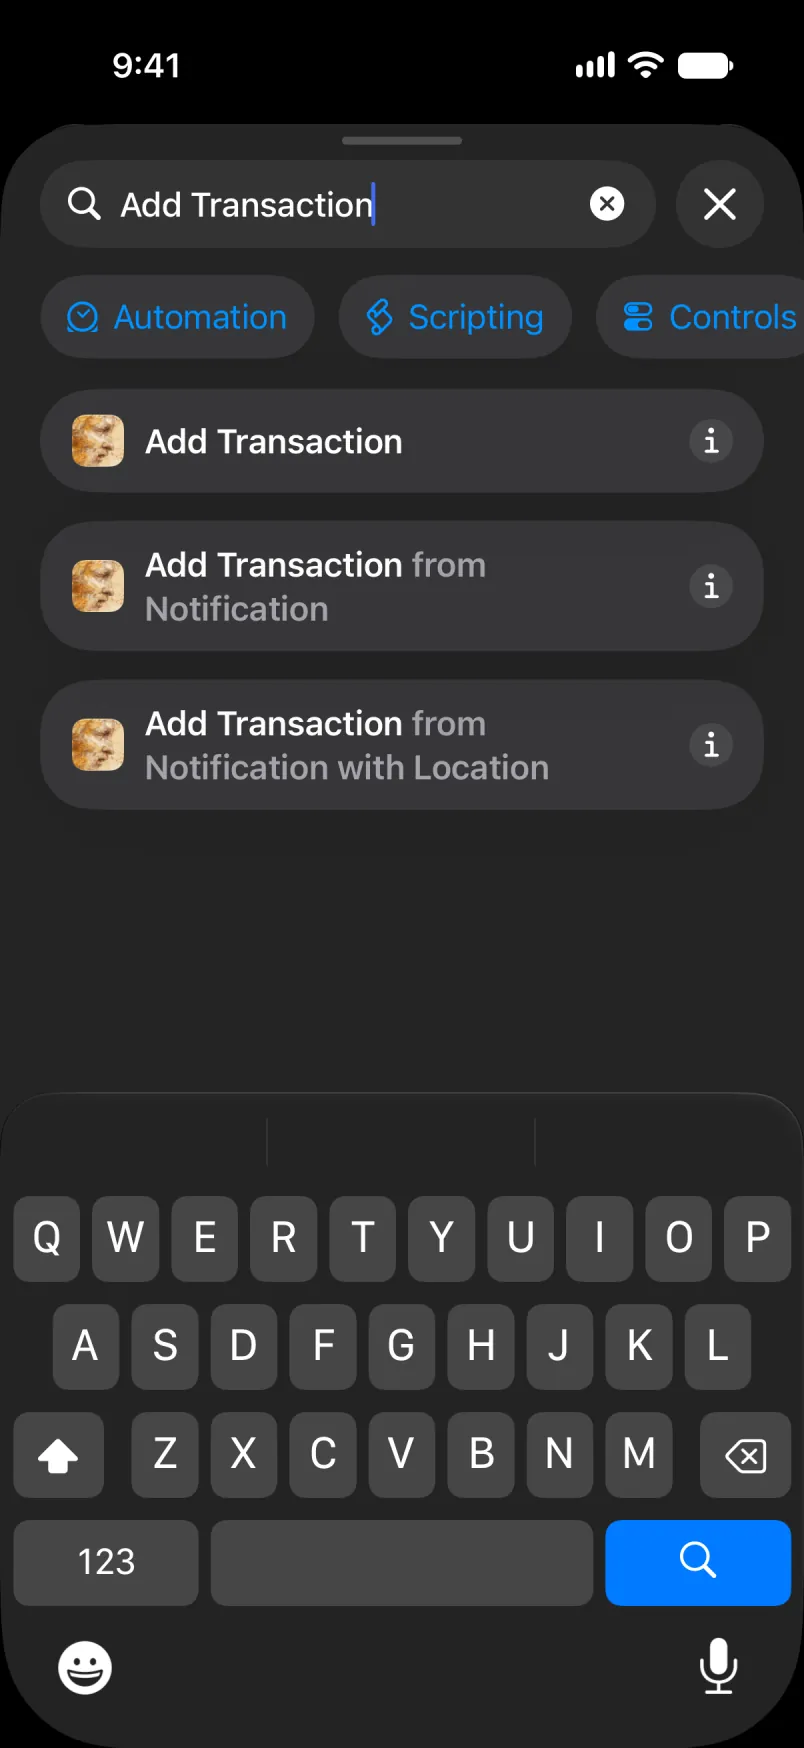
Tap Amount, then Select Variable, then Transaction. Tap the blue word in the row and choose Amount. Do the same for Merchant, and for Card with Card or Pass.
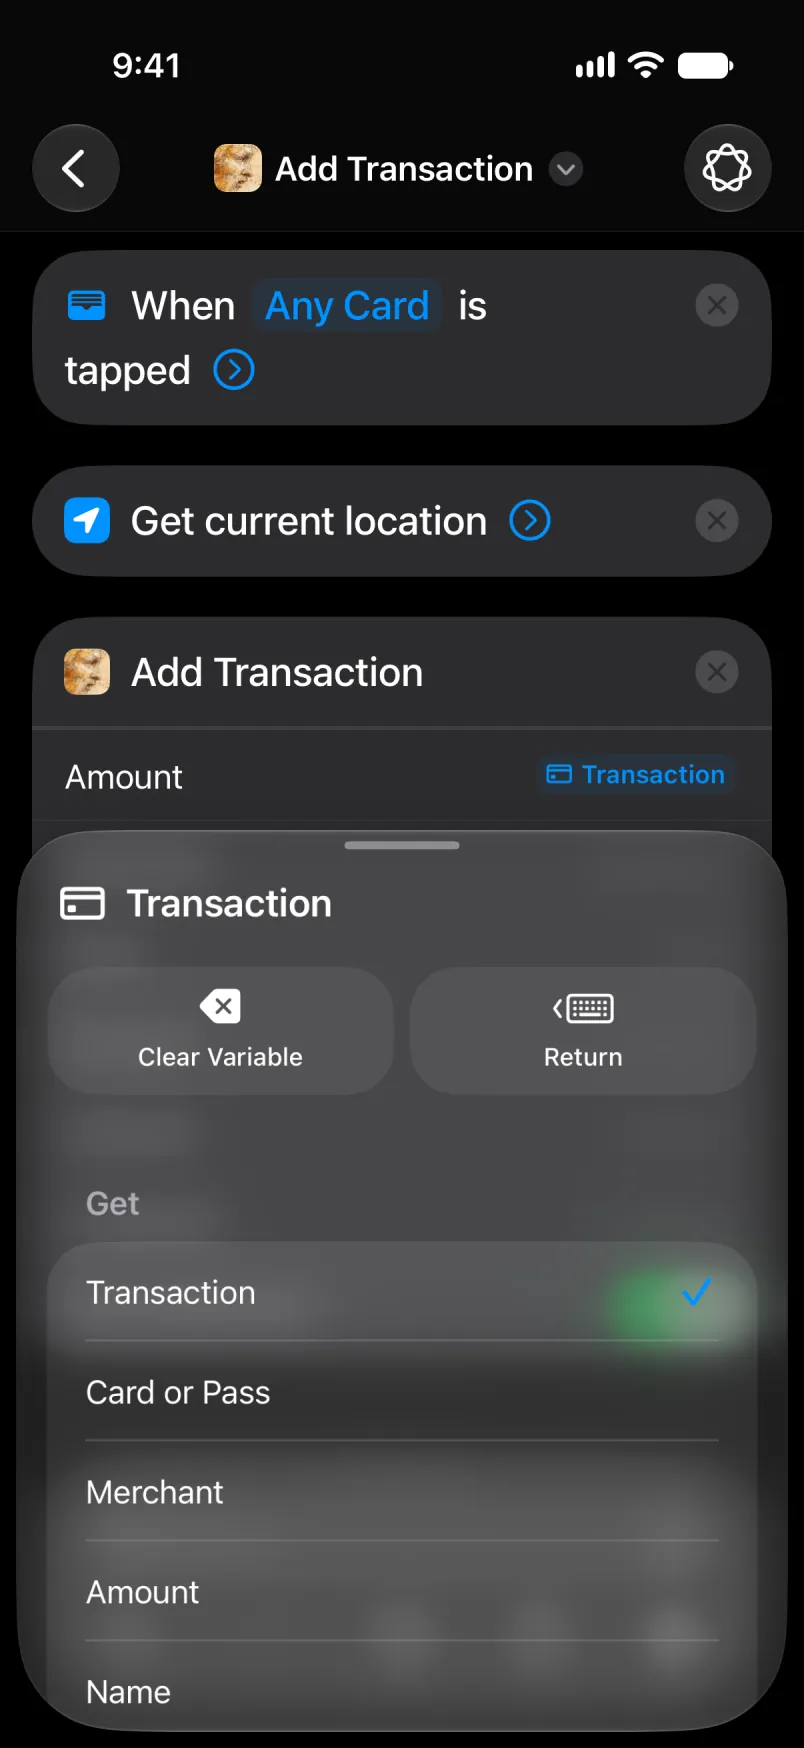
Tap Latitude, then Select Variable, then Current Location. Tap the blue word and choose Latitude. Do the same for Longitude.
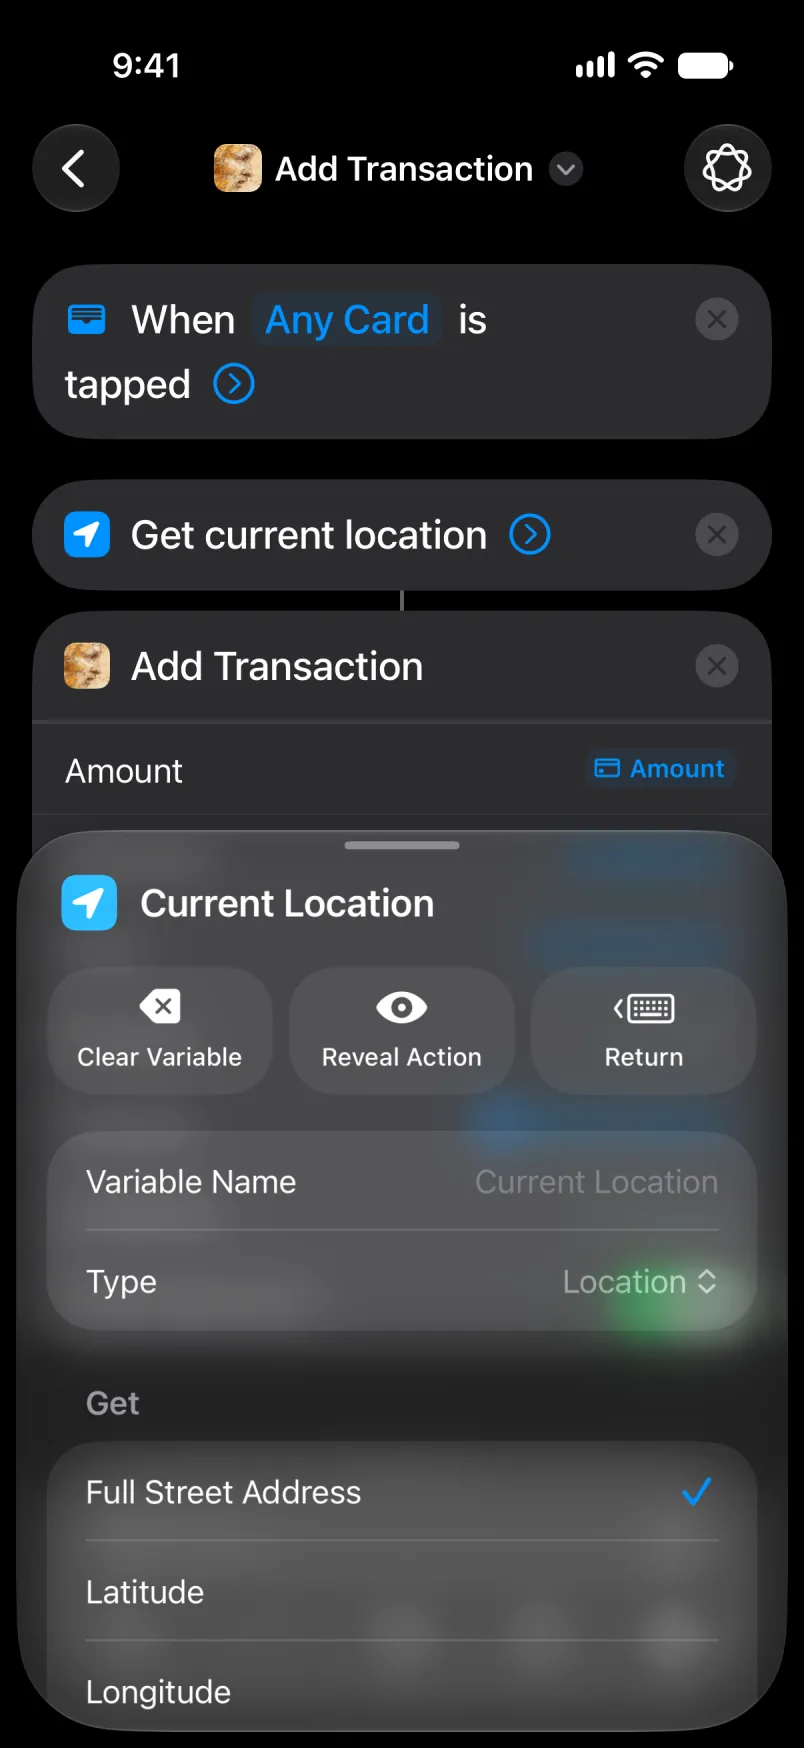
In Account, type Main if you want the payments booked on your Main account.
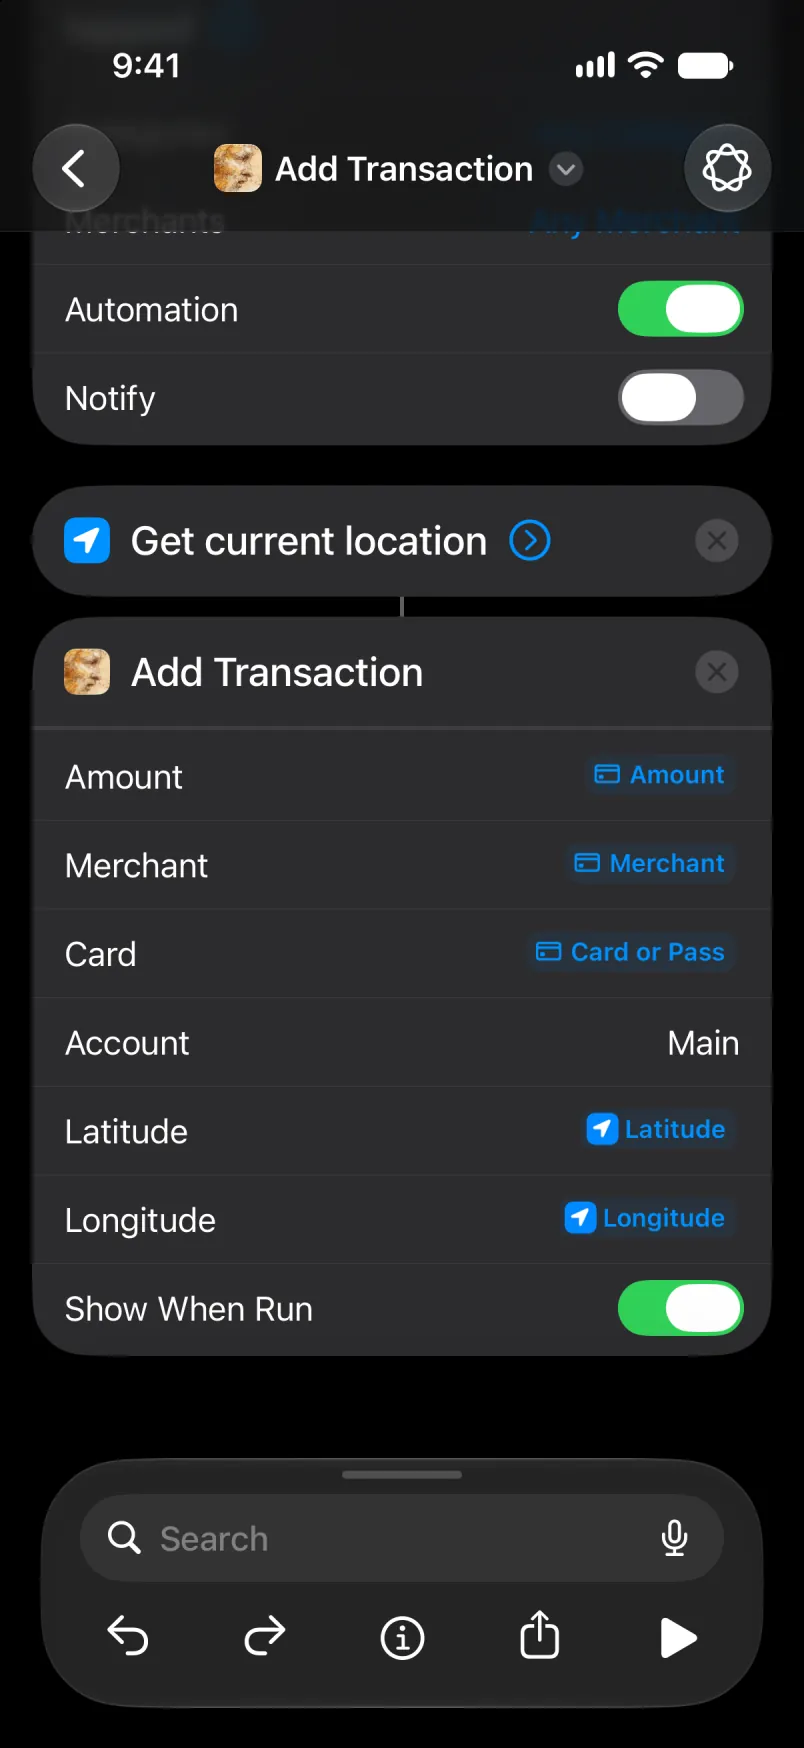
The whole automation, from the top. Leave Any Category and Any Merchant as they are, and keep Automation on. Tap the name to rename it, and the arrow at the top left to save. The new automation appears in the list.
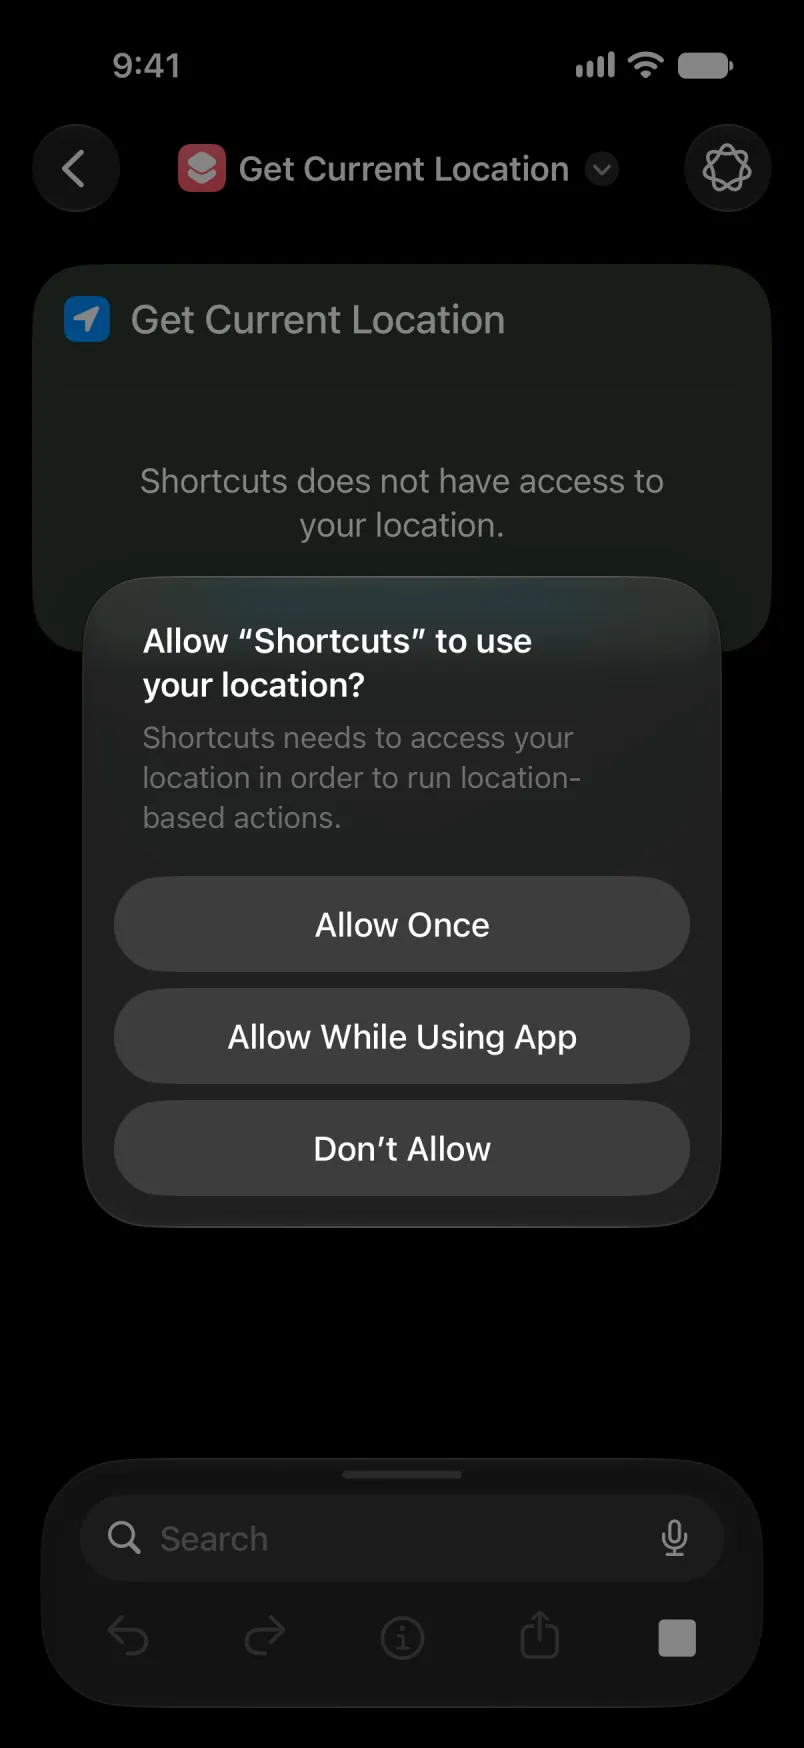
The first time a shortcut asks for your location, tap Allow While Using App.
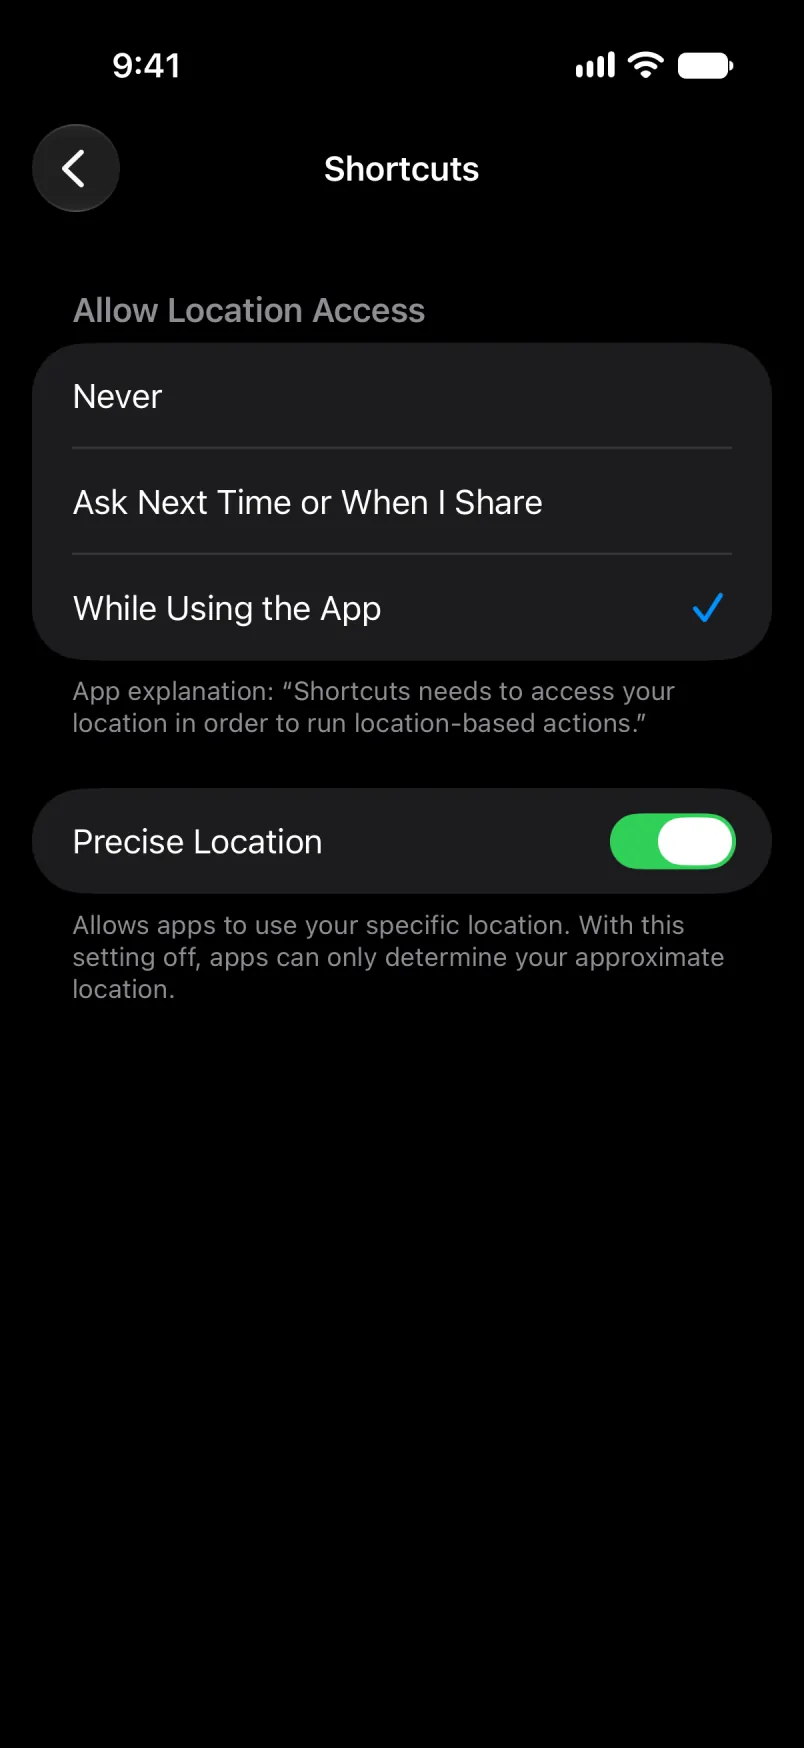
You can check it in the iPhone’s Settings: Privacy & Security, Location Services, Shortcuts. Keep Precise Location on, or the place is only approximate.
Leave Account empty for your default account, or type the account’s name. For Main and Shared, type the English name, even if your app is in another language. A translated name, such as Primær in Danish, stops matching if you switch the app’s language later: the payment then lands on your default account, with the name under Imported details. An account you made yourself has one name, the one you gave it.
When it works
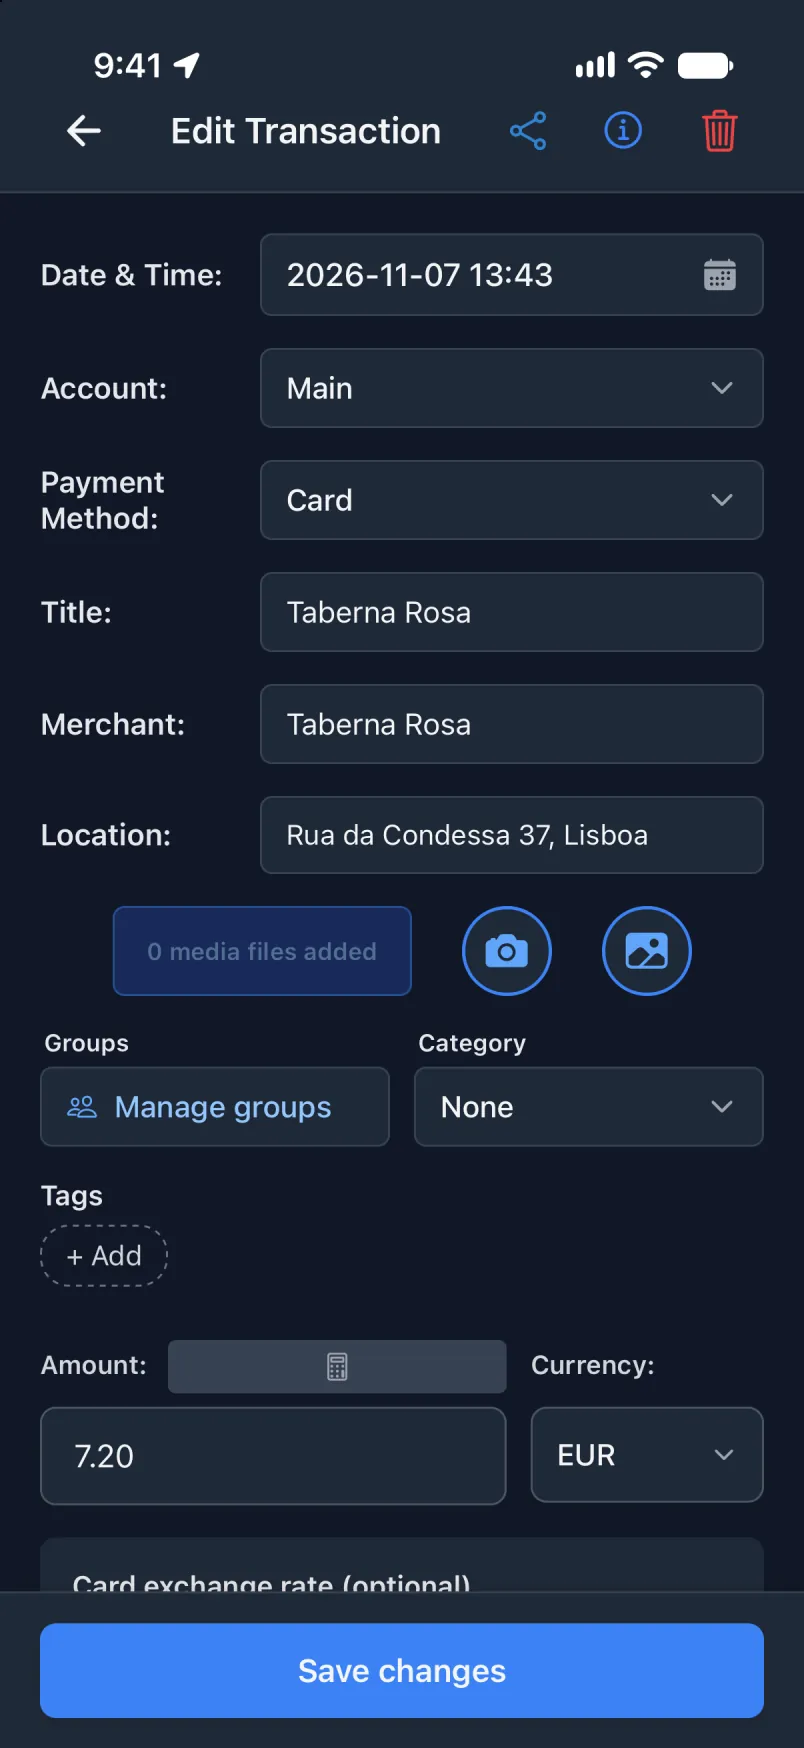
Open the app after you have paid. The green banner shows the payment, and Edit opens it.
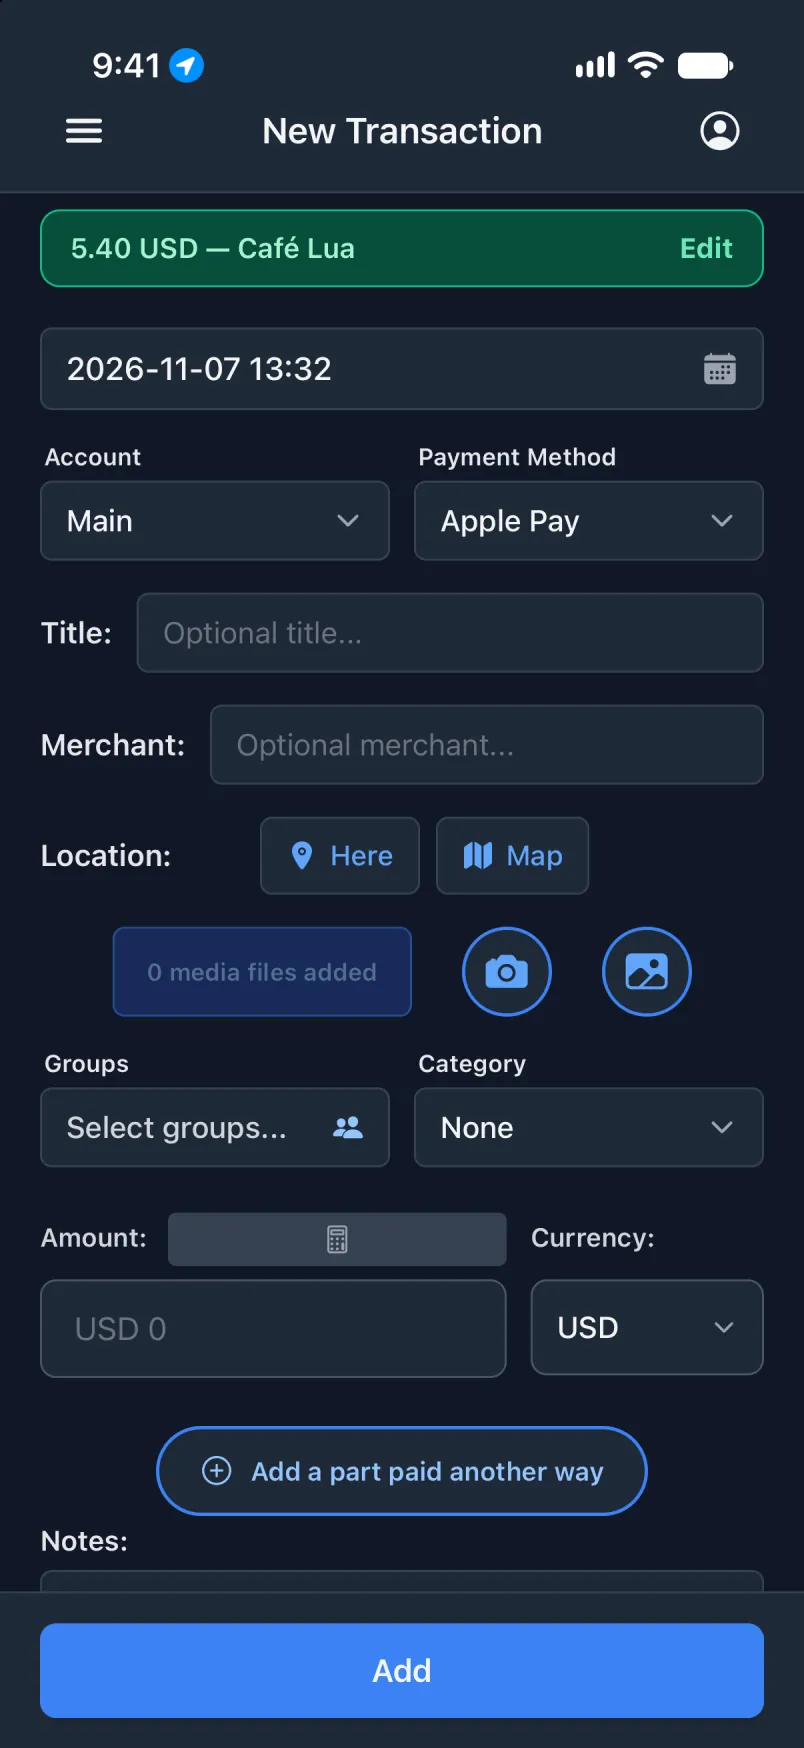
A Wallet automation cannot be run by hand, so a small real payment is the test. Turn on Notify while you test: it is the only sign that the automation ran.
The same, on your Shared account
Give a card its own automation, and its payments land on the right account. It is the setup above with two changes: only this card is ticked, and Account says Shared.
In the Transaction app
Settings, Accounts & payment methods shows your accounts. The name in the automation has to match one of them.
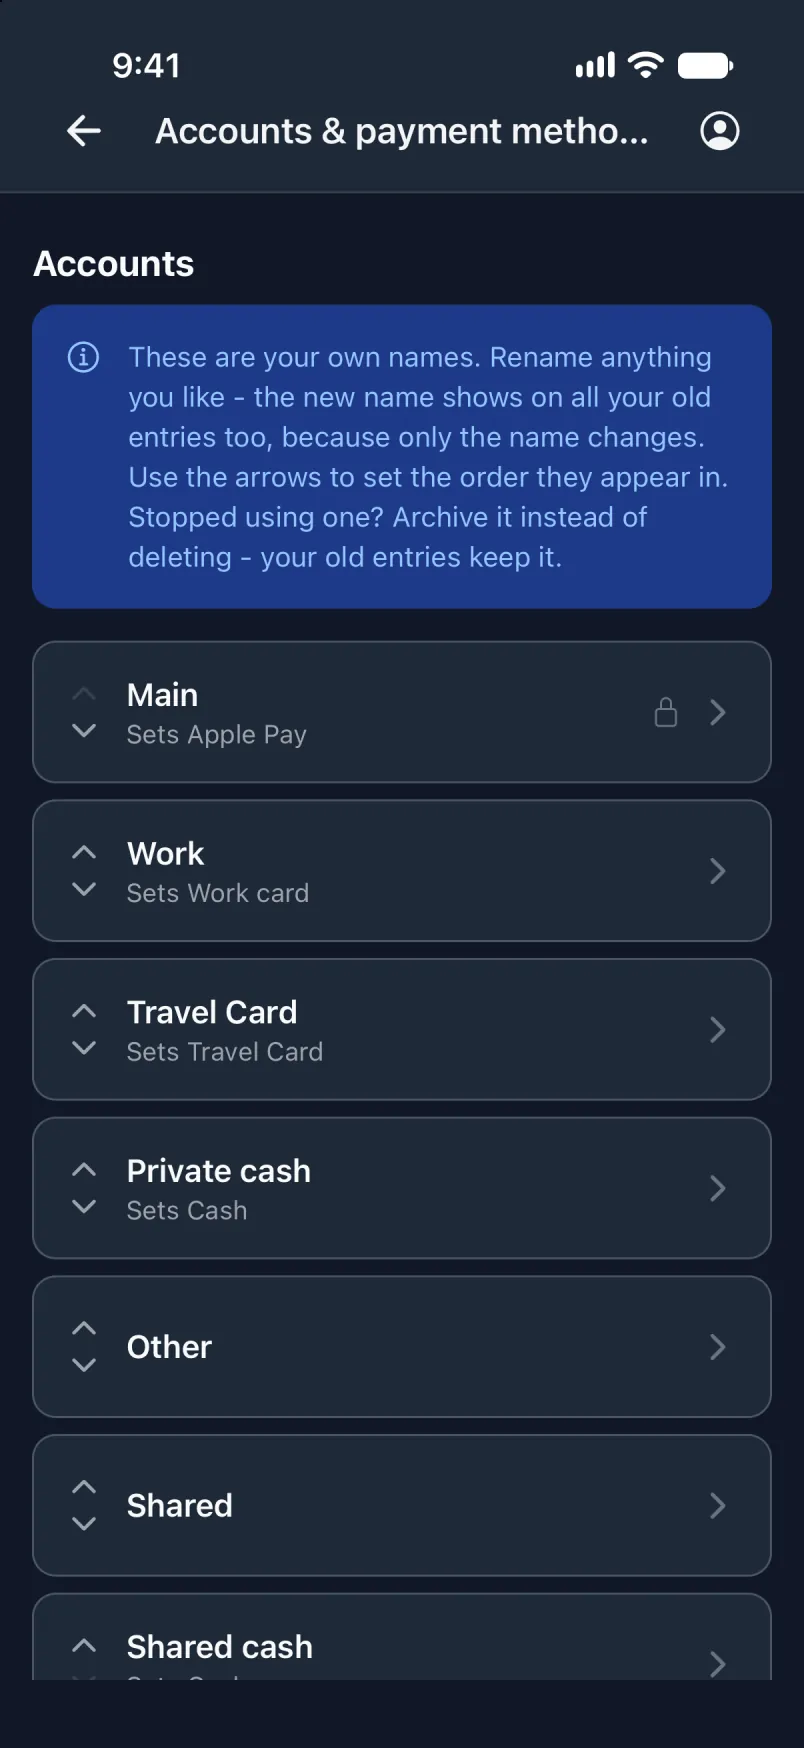
In Shortcuts
Build it as above. Under Any Card, tick only the Shared card. In Account, type Shared if you want the payments booked on your Shared account, and tap the arrow at the top left to save.
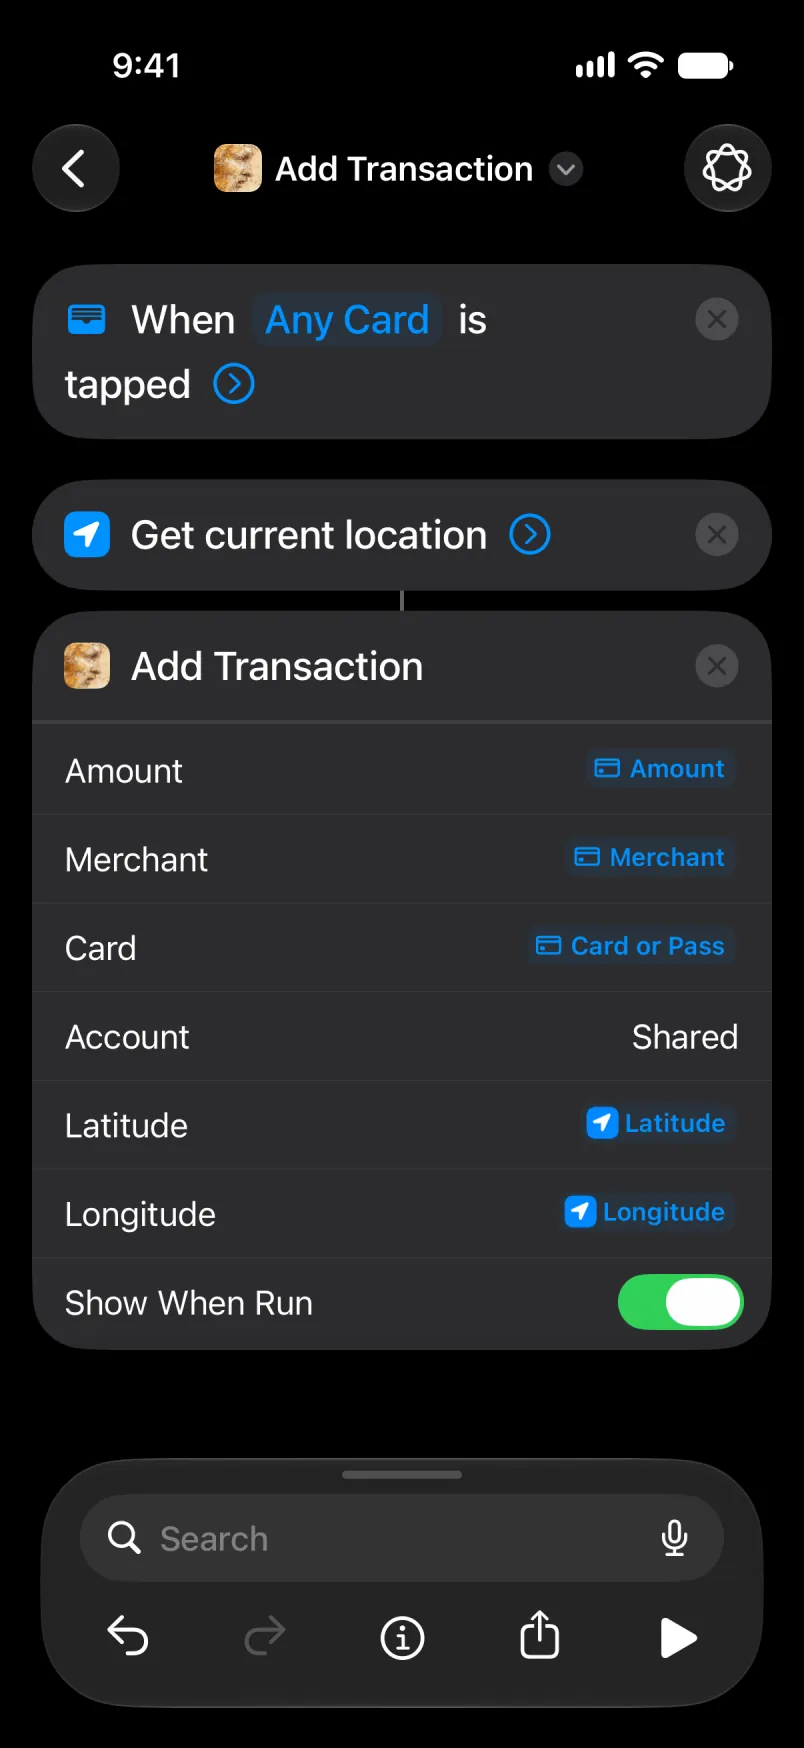
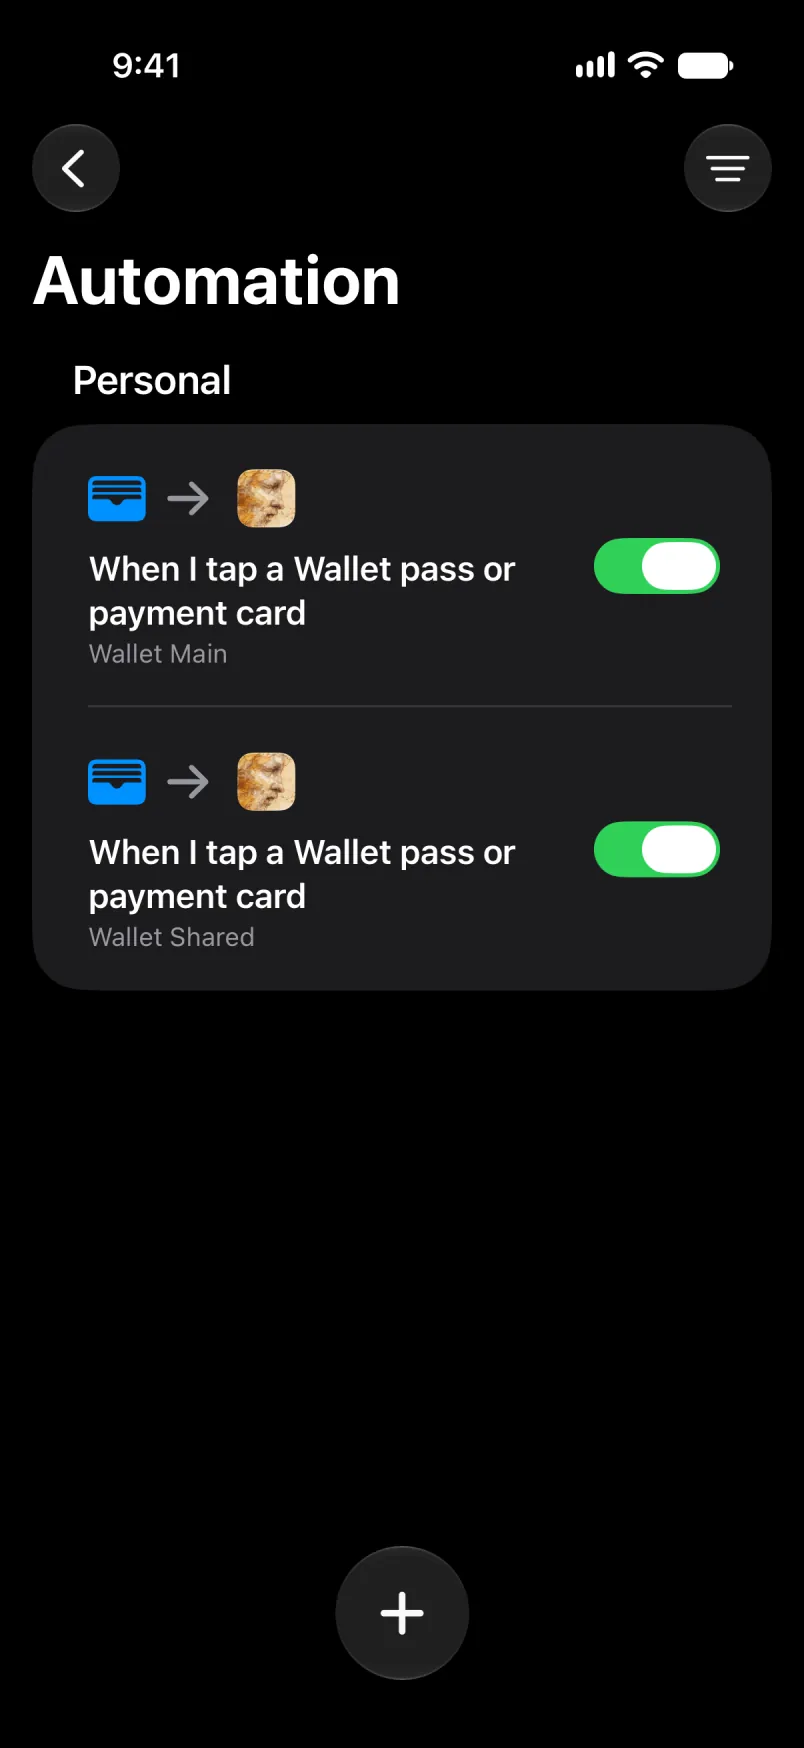
The new automation appears in the list. Open your first automation and untick this card there: a card ticked in two automations books every payment twice.
Leave Account empty for your default account, or type the account’s name. For Main and Shared, type the English name, even if your app is in another language. A translated name, such as Primær in Danish, stops matching if you switch the app’s language later: the payment then lands on your default account, with the name under Imported details. An account you made yourself has one name, the one you gave it.
When it works
The same green banner.
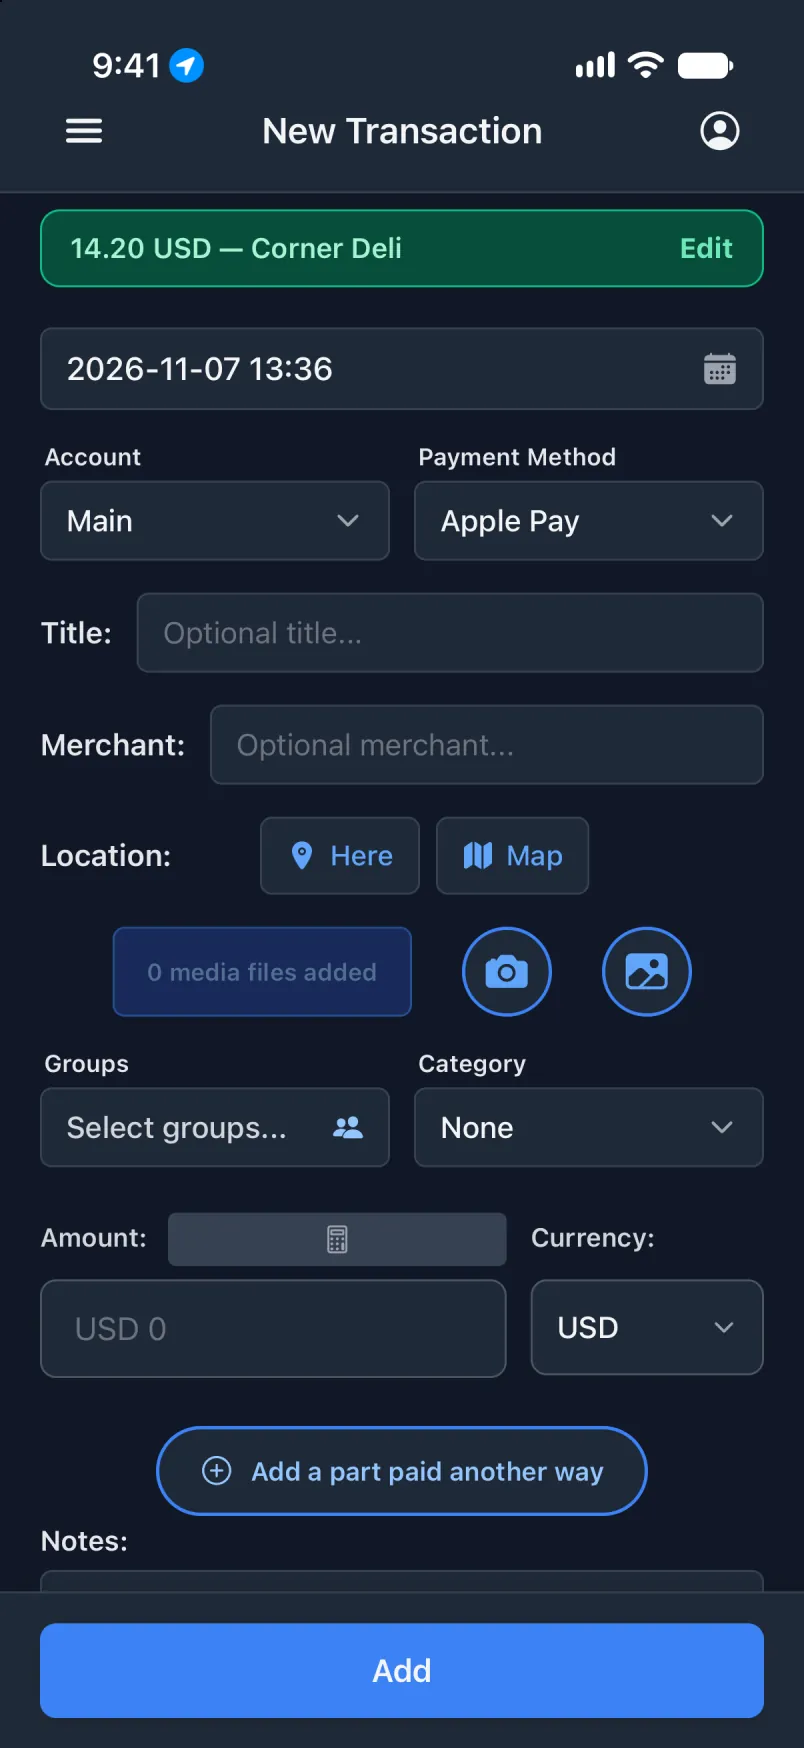
Tap Edit to check it: Account says Shared.
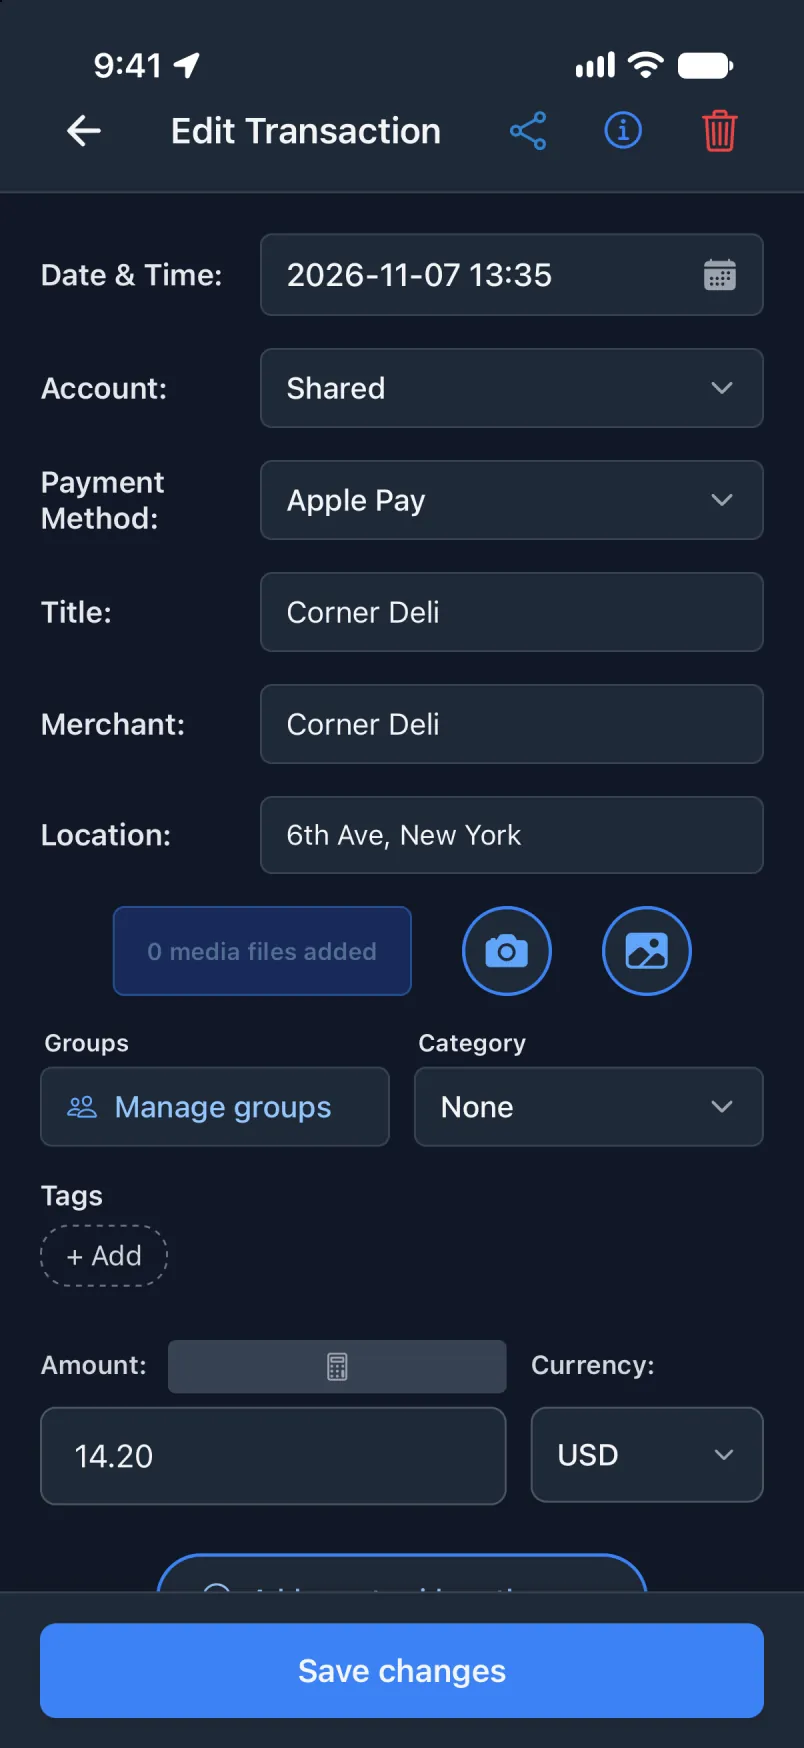
A notification from Nordea
Nordea Mobile sends a notification when you pay by card in a foreign currency. The automation hands it to Transaction, which reads the amount, the currency and the shop. There is no location step here, so payments made online work too. The Notification trigger needs iOS 27.
Another bank or app? It works the same way with General (English only) or General (all languages): choose your app in the trigger and one of those two under Source. They try to read any app, and they will miss sometimes.
In the Transaction app
Settings, Create transactions from notifications. There is nothing to switch on: building the automation is all it takes.
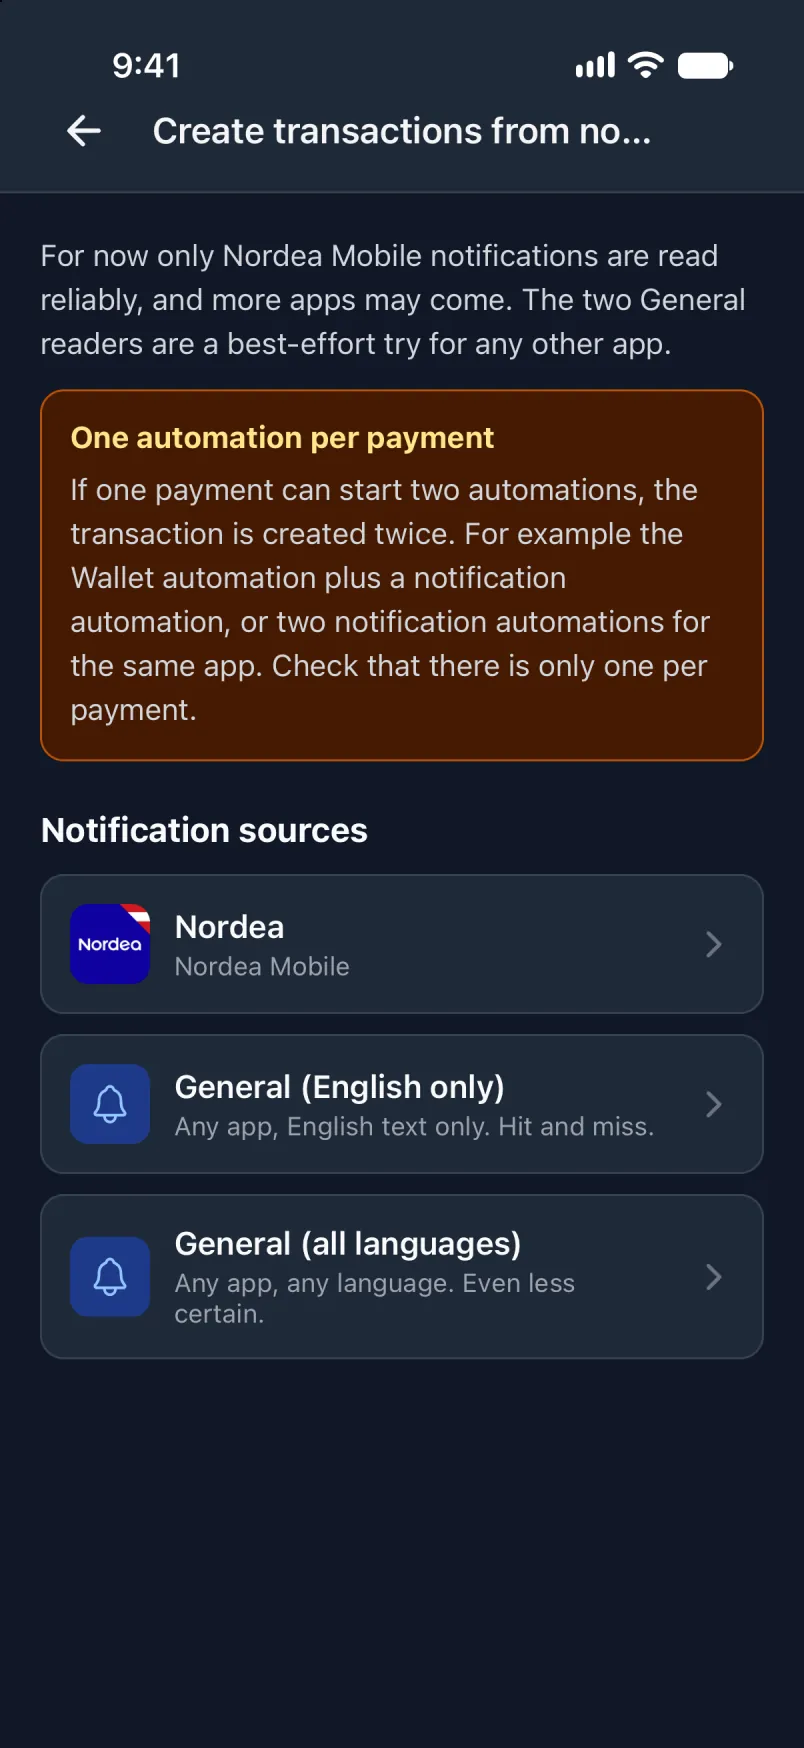
Tap Nordea to see what it reads. It only works for card payments in a foreign currency.
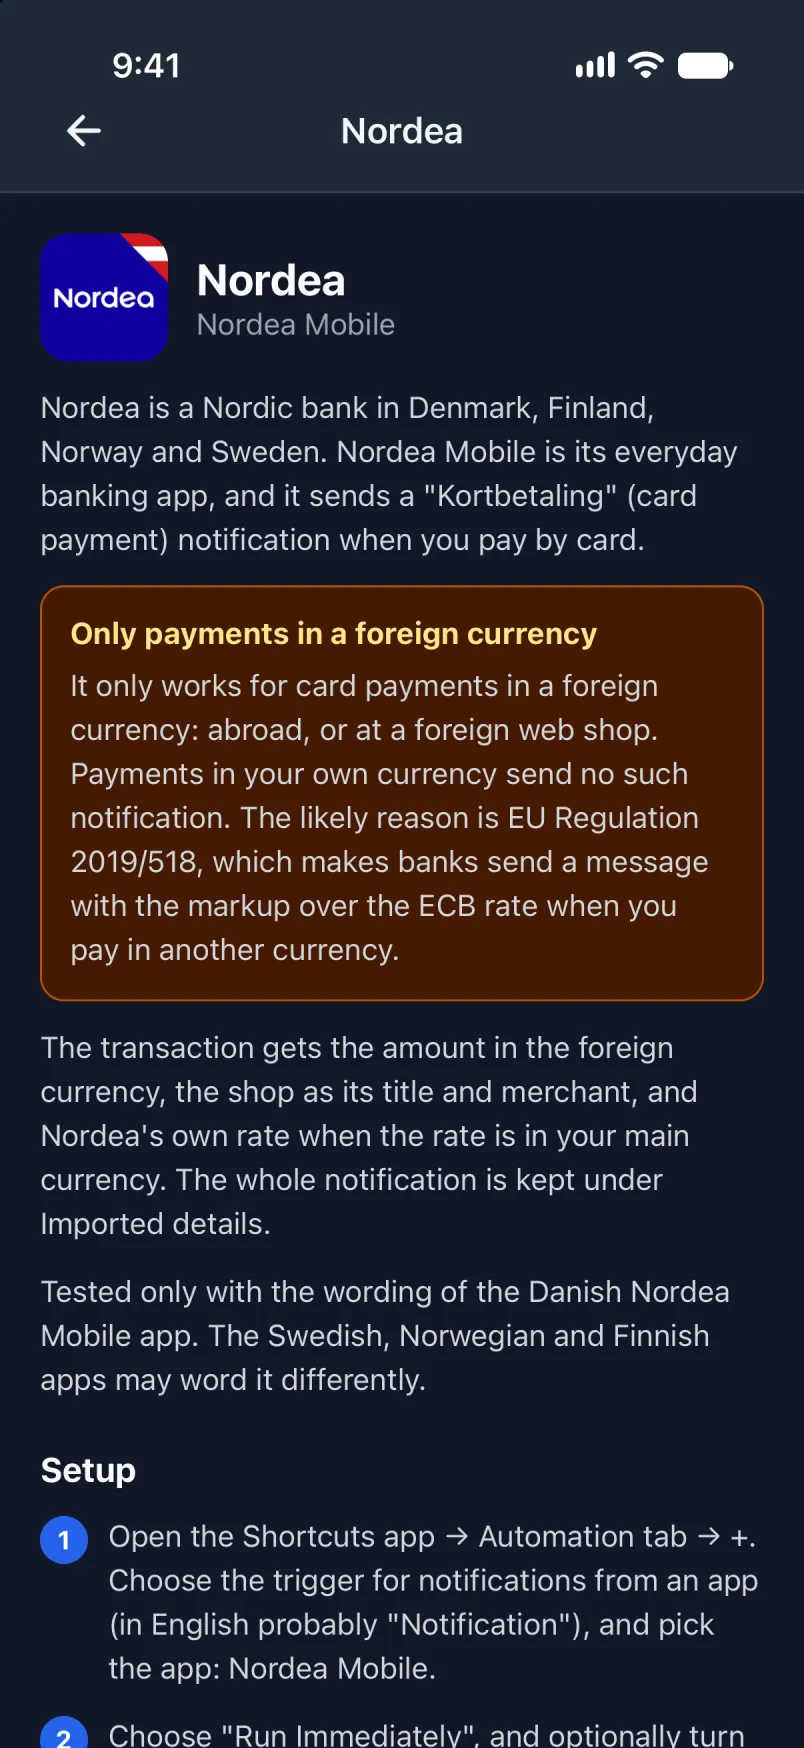
In Shortcuts
Start a new automation as before: Library, Automation, +, Edit, Search, Automation. Type Notification and tap it.
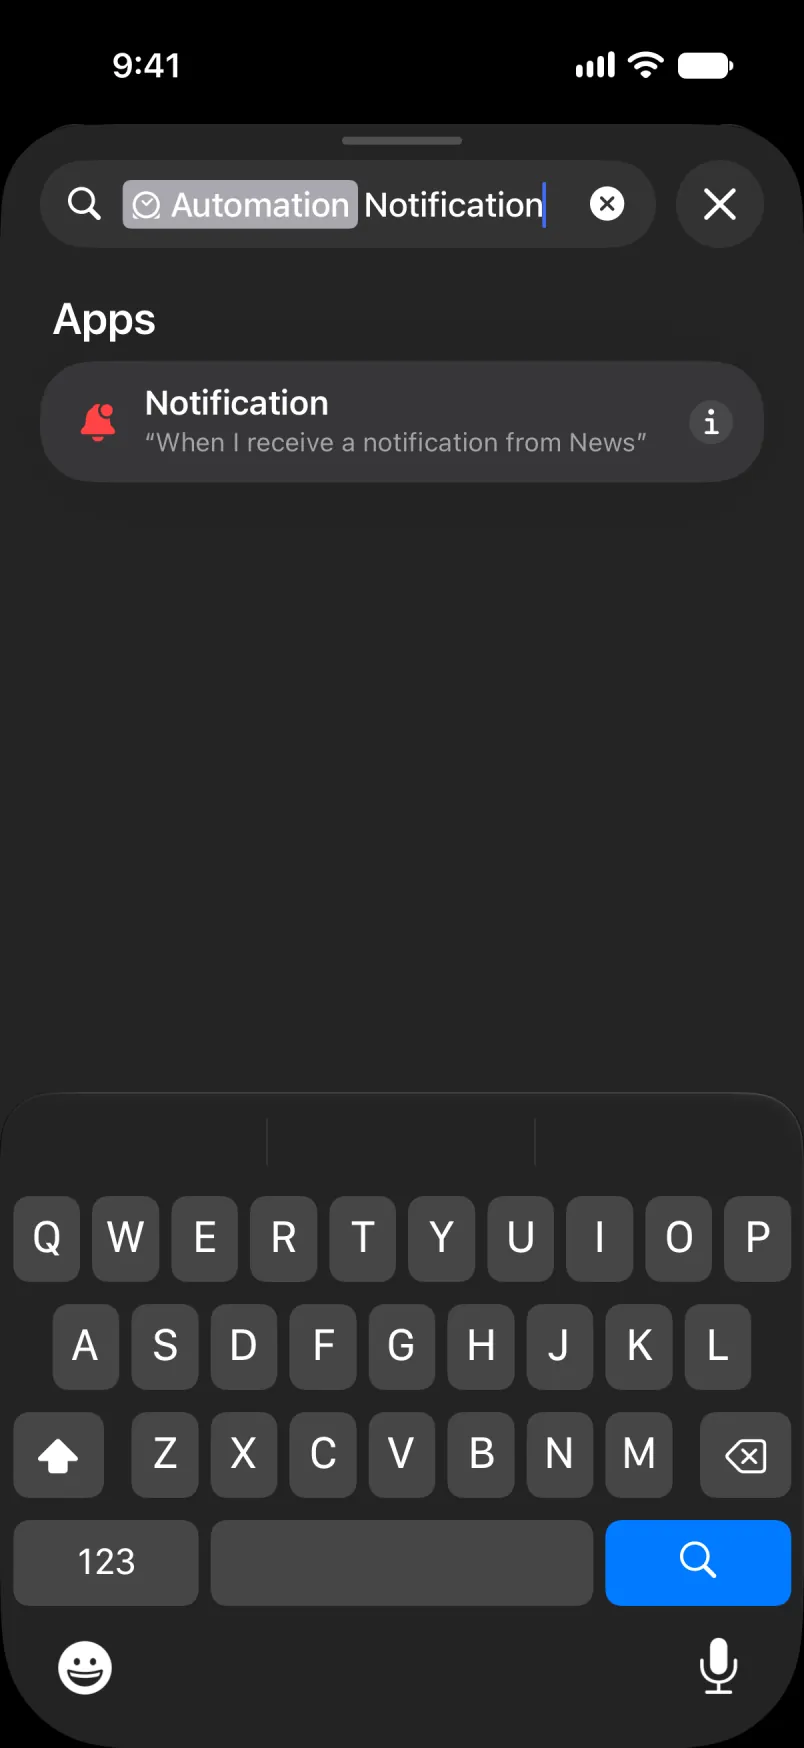
Tap App, search for Nordea Mobile and tap it.
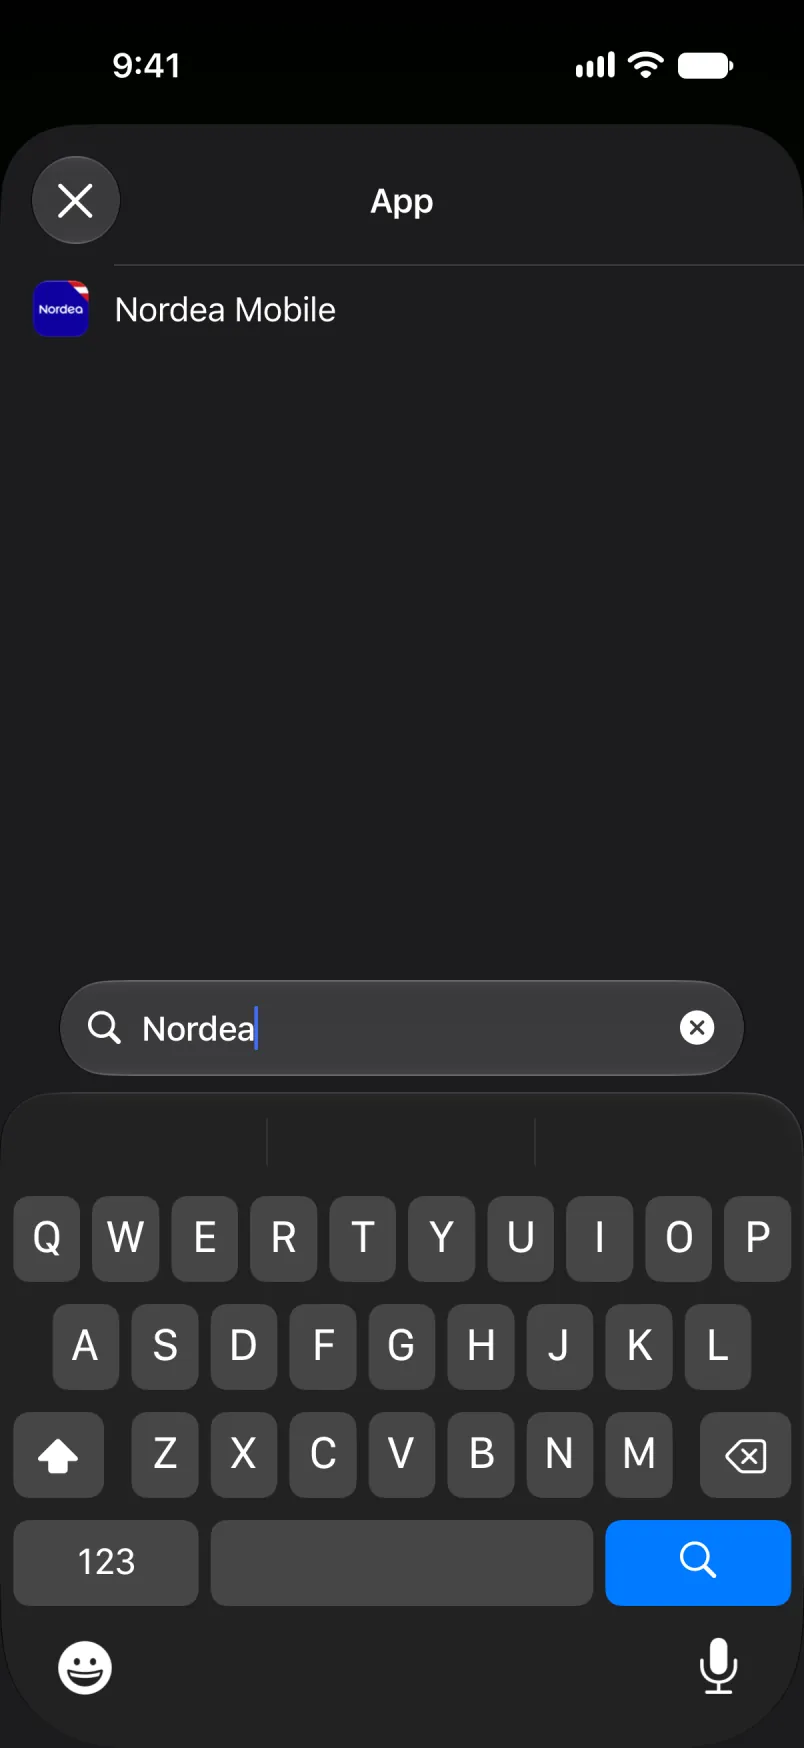
Leave the filter empty, and keep Automation on.
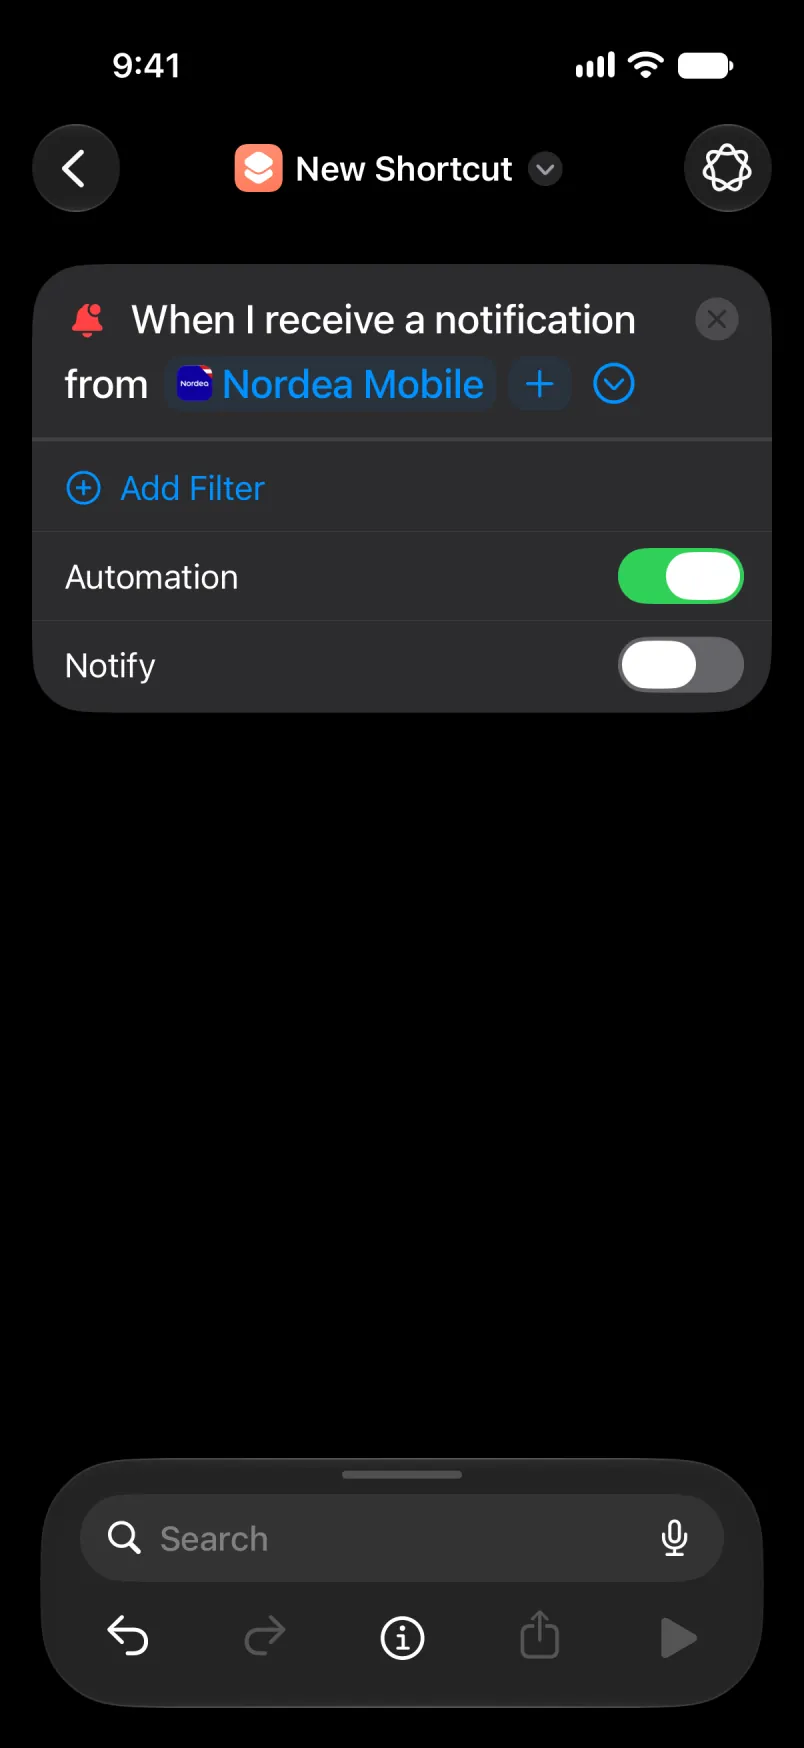
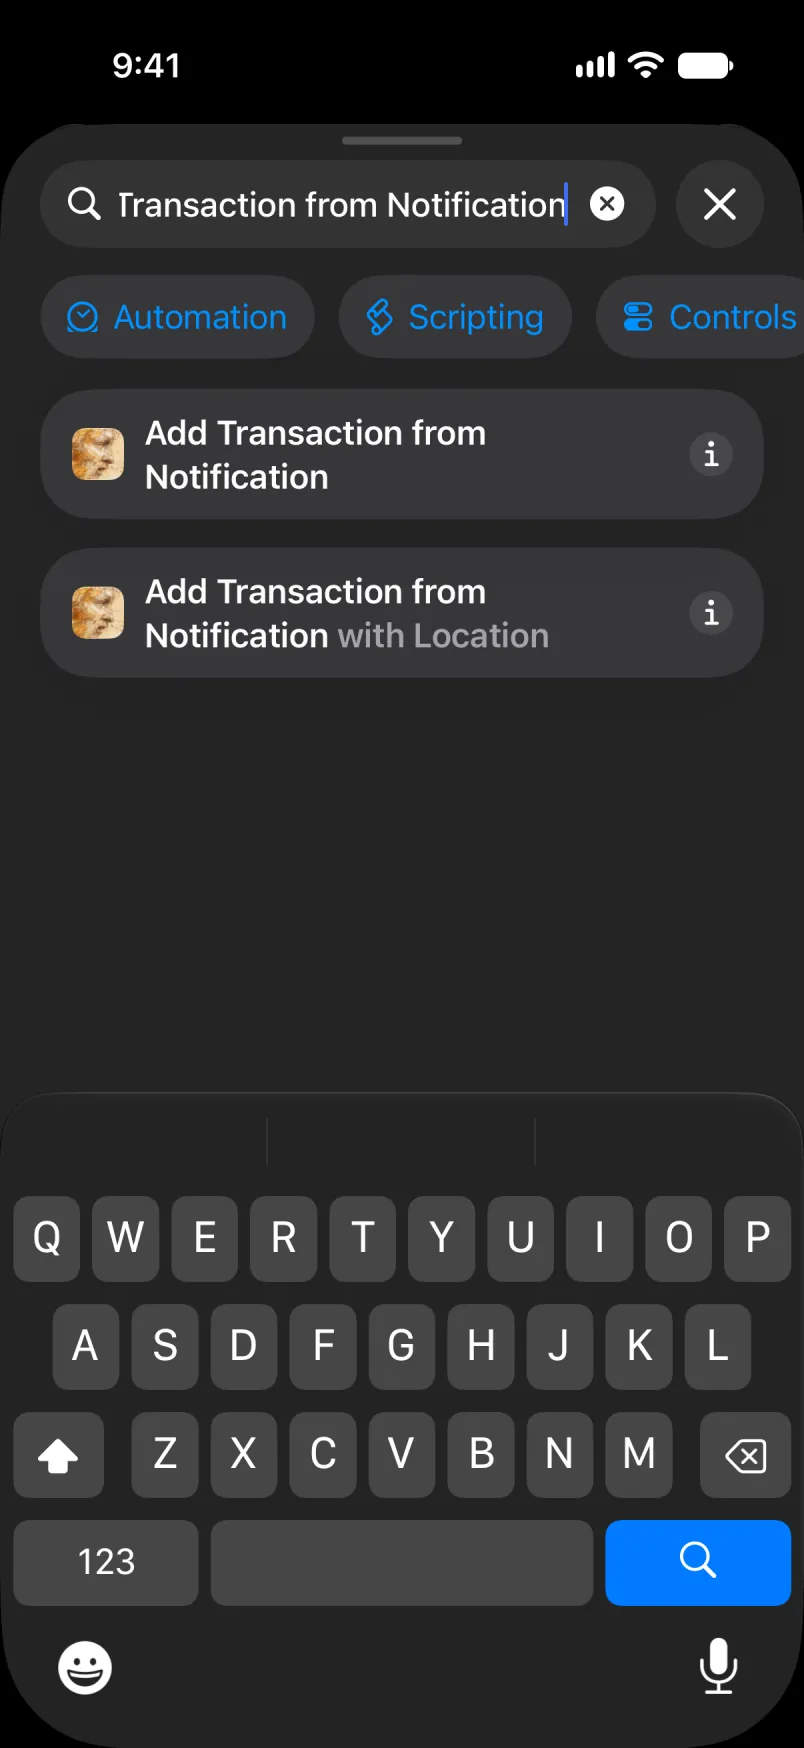
Search for Add Transaction from Notification and tap the first one.
Tap Source and choose Nordea Mobile.
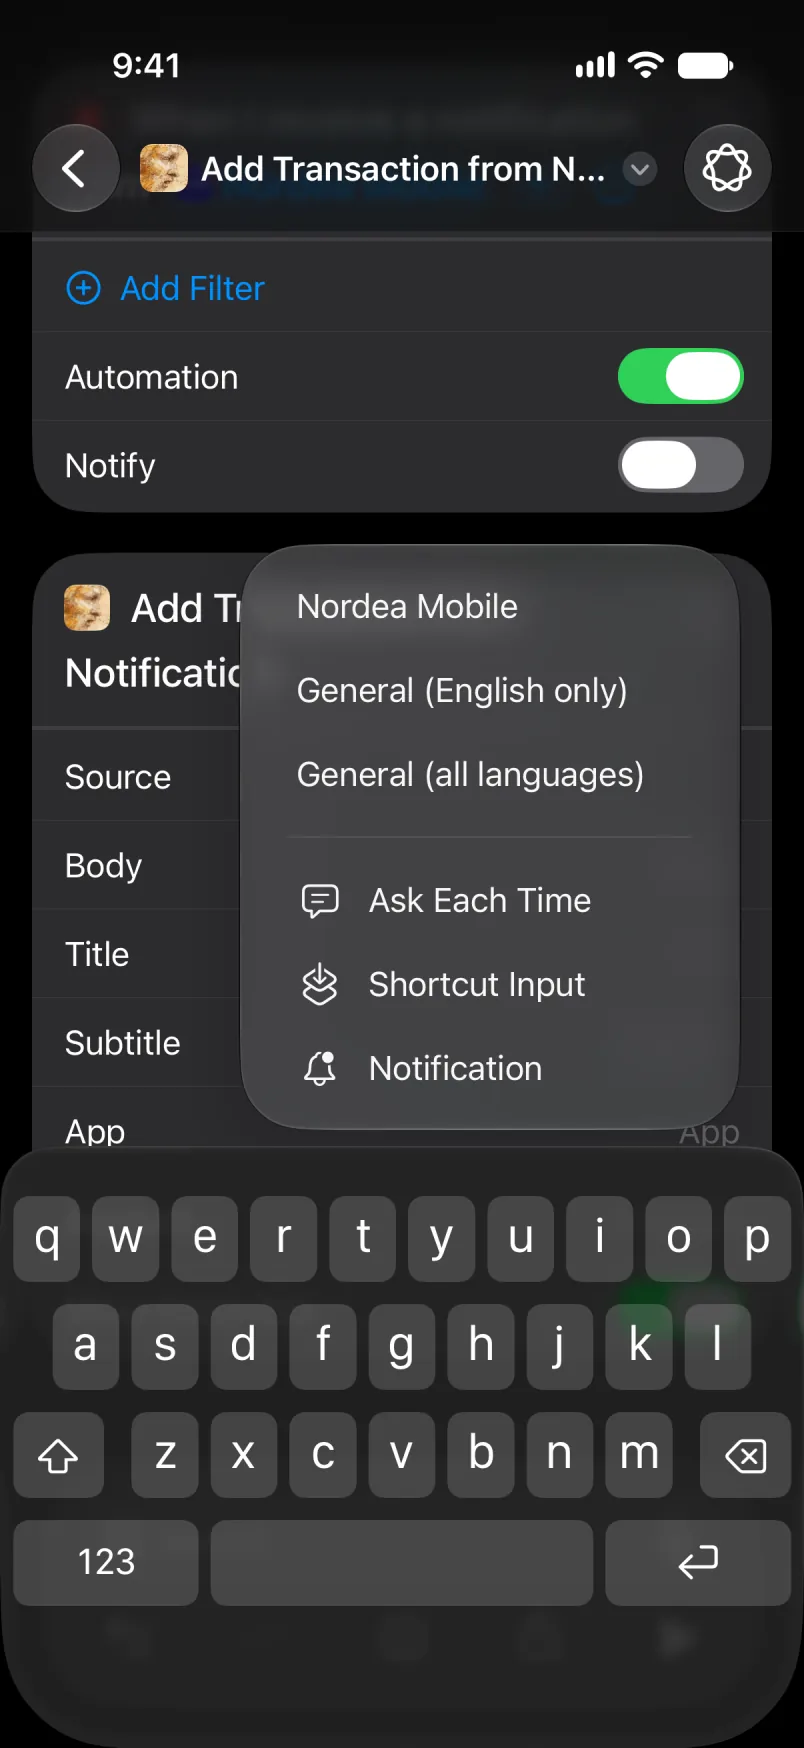
Tap Body, then Select Variable, then Notification. Tap the blue word and choose Body. Do the same for Title, Subtitle and App.
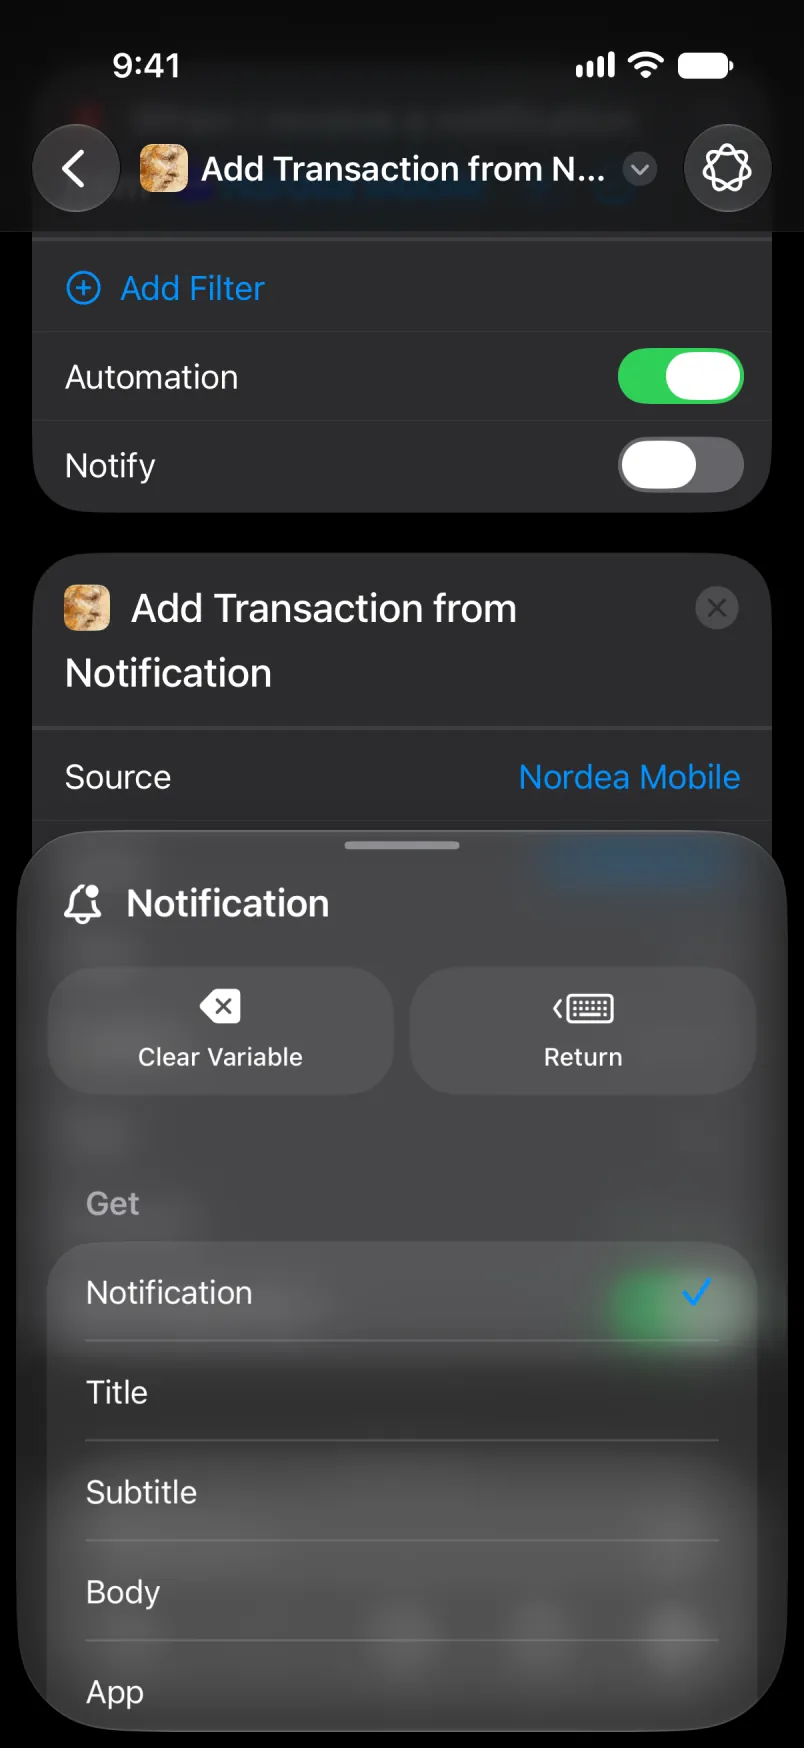
The whole automation, from the top.
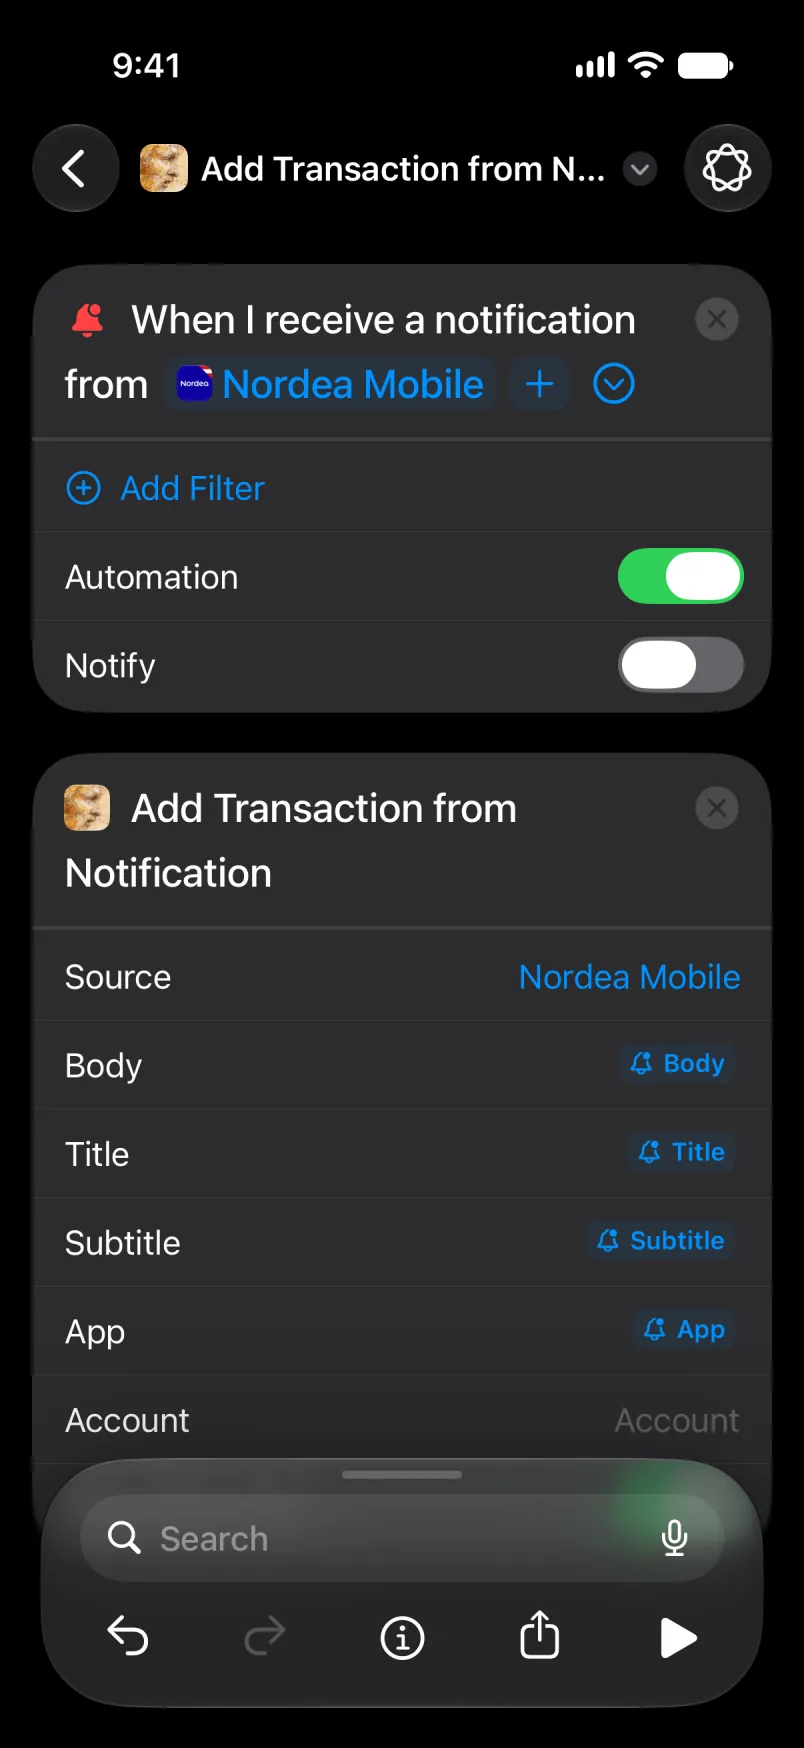
And the action in full. Tap the arrow at the top left to save, and the new automation appears in the list.
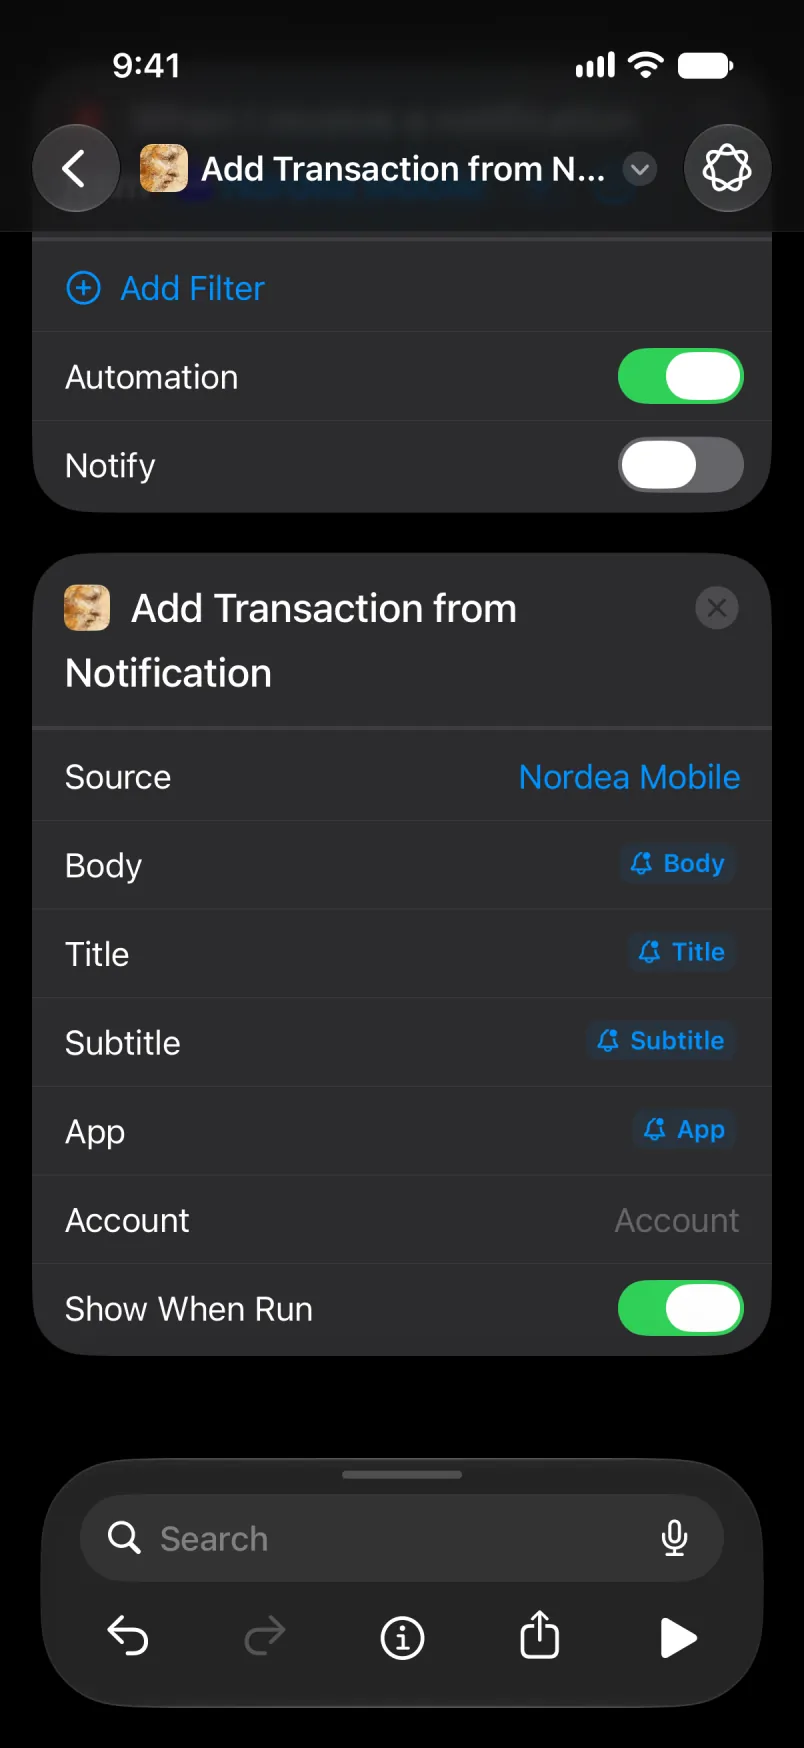
Leave Account empty for your default account, or type the account’s name. For Main and Shared, type the English name, even if your app is in another language. A translated name, such as Primær in Danish, stops matching if you switch the app’s language later: the payment then lands on your default account, with the name under Imported details. An account you made yourself has one name, the one you gave it.
Keep it to one automation per payment, apart from the two Nordea automations in the next section. A foreign Apple Pay payment can start both a Wallet and a Nordea automation, and then the transaction is created twice. And if any step fails, Shortcuts stops there and nothing is saved.
When it works
Open the app. The banner shows the amount in the foreign currency.
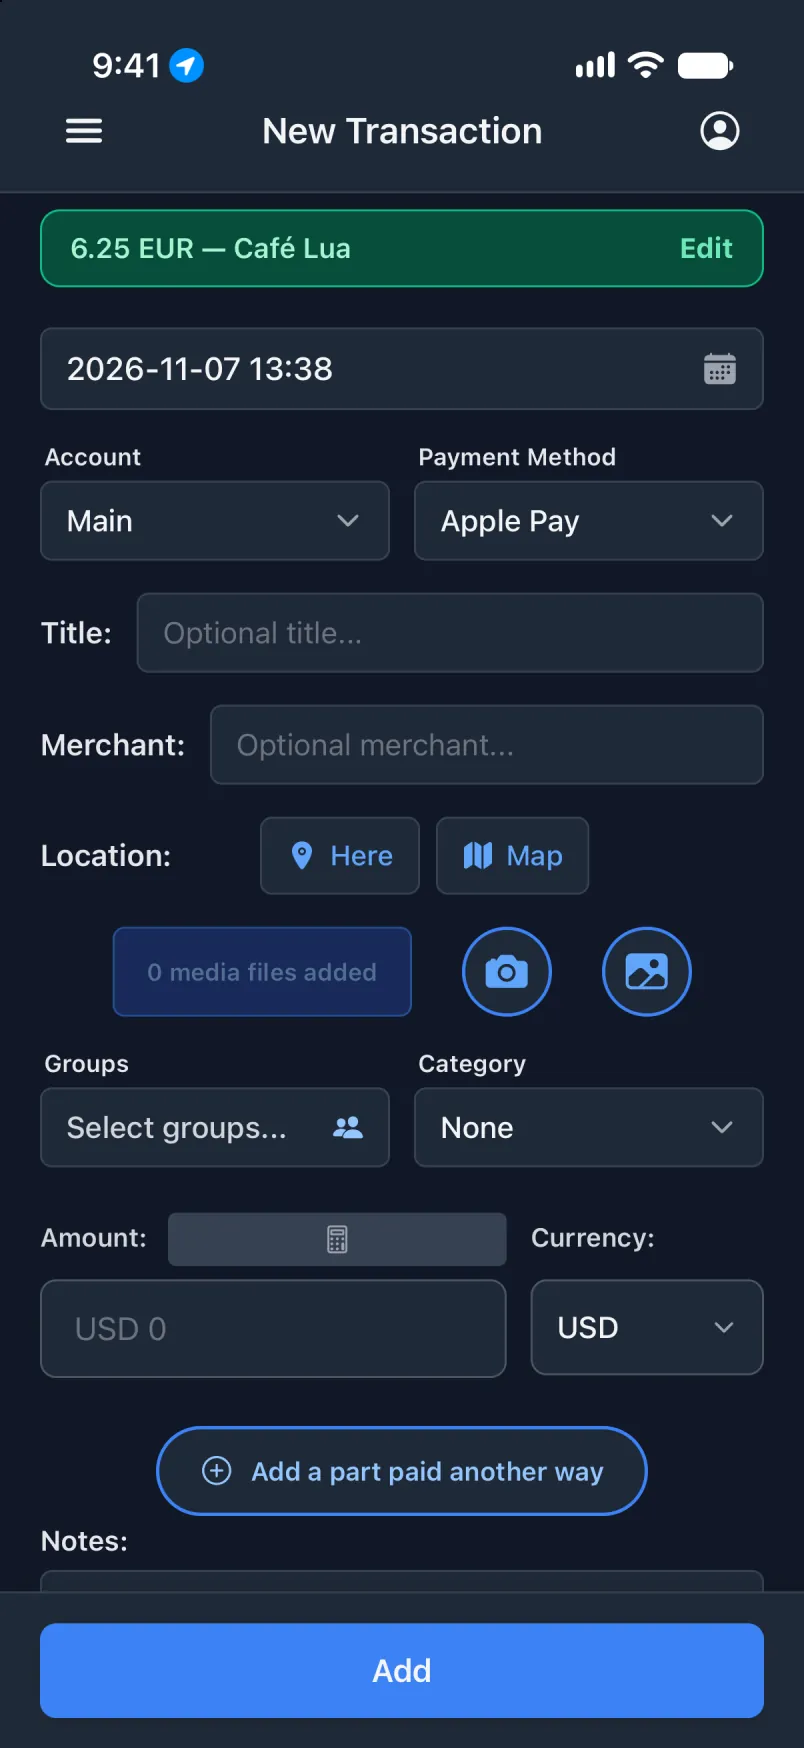
The whole notification is kept under Imported details.
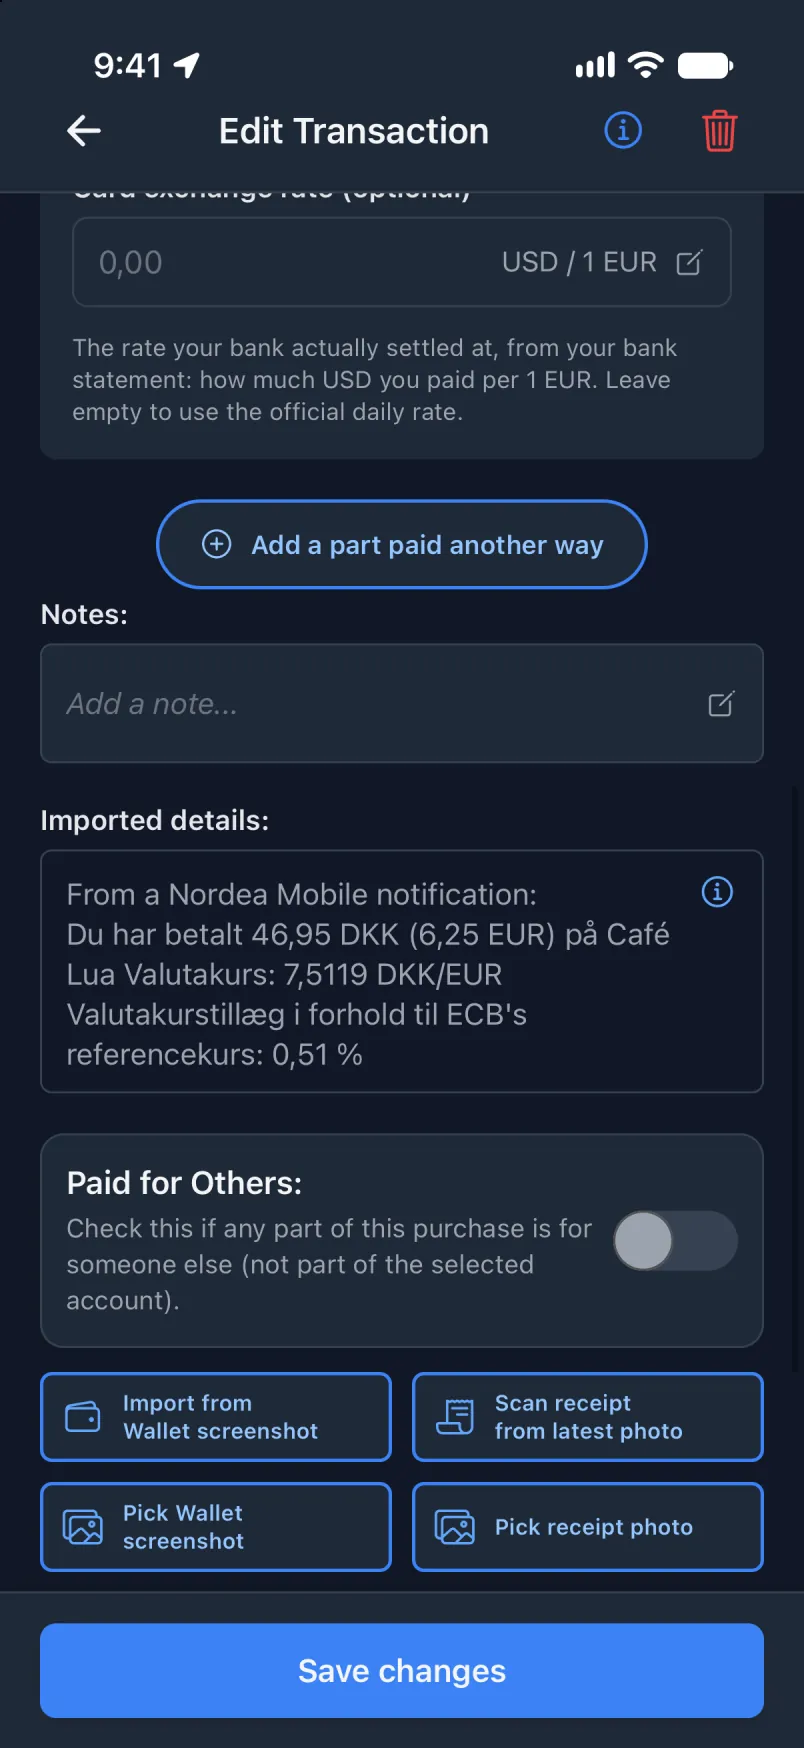
The automation runs for every notification from Nordea Mobile. The ones that are not payments are skipped.
A notification from Nordea, with the place
The same automation, plus where your phone is when the notification arrives. Keep the one above on as well, as a safety net. When the location step works, the app saves the payment once, with the place. When it fails, the one above still saves the payment, without the place.
Another bank or app? It works the same way with General (English only) or General (all languages): choose your app in the trigger and one of those two under Source. They try to read any app, and they will miss sometimes.
In the Transaction app
Nothing new here. The only permission goes to Shortcuts: While Using the App, with Precise Location on, as in the first automation.
In Shortcuts
Build the trigger as above and add Get Current Location. Search for with Location and tap Add Transaction from Notification with Location.
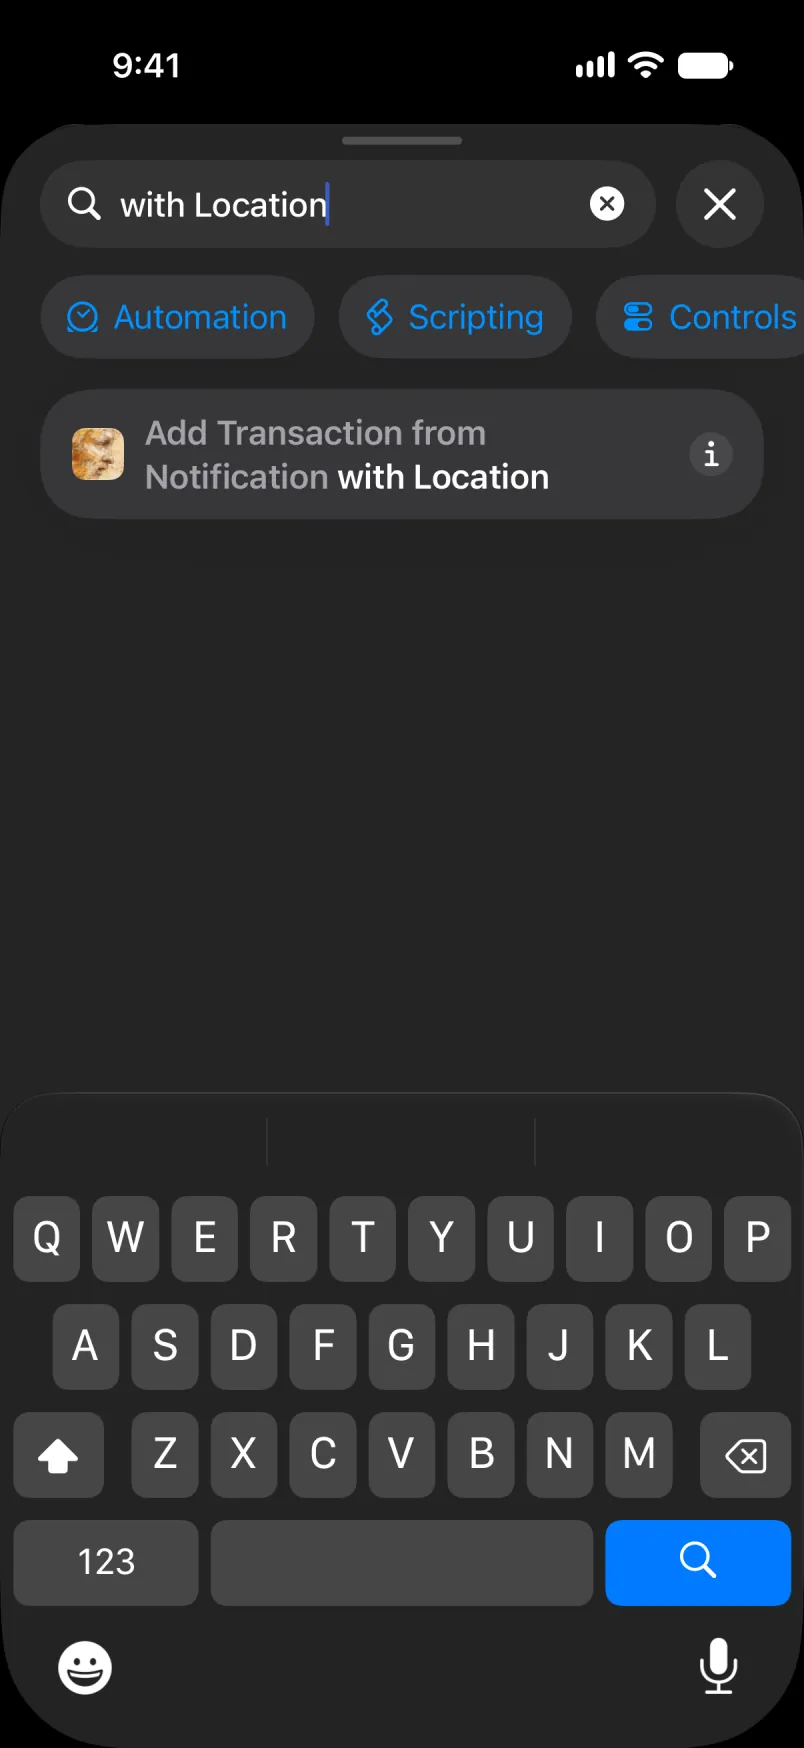
The whole automation, from the top: the trigger, Get Current Location, then the action.
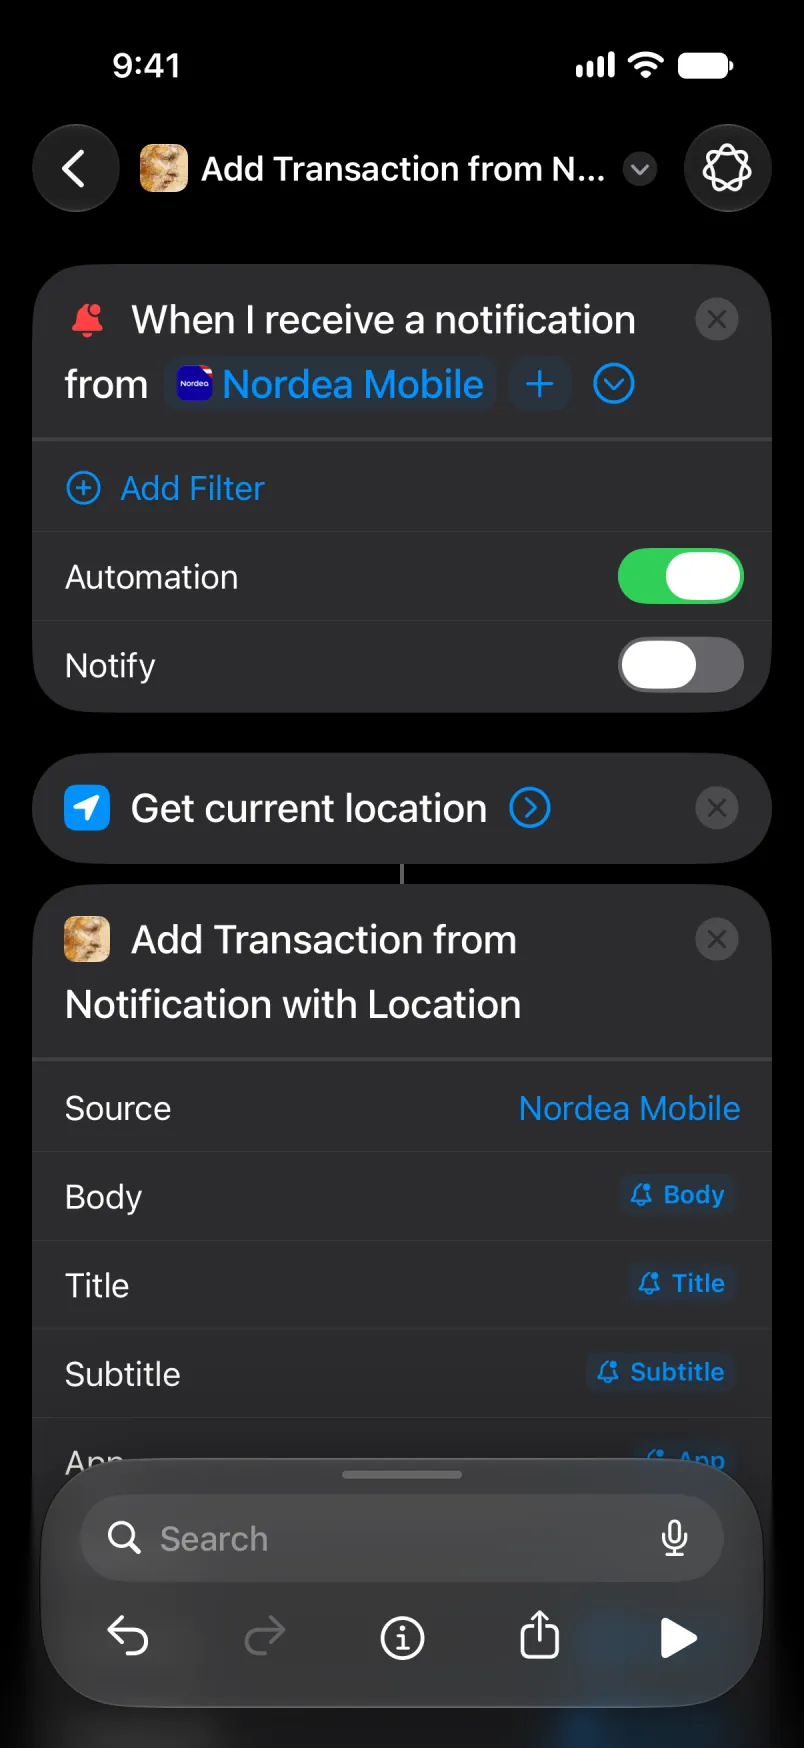
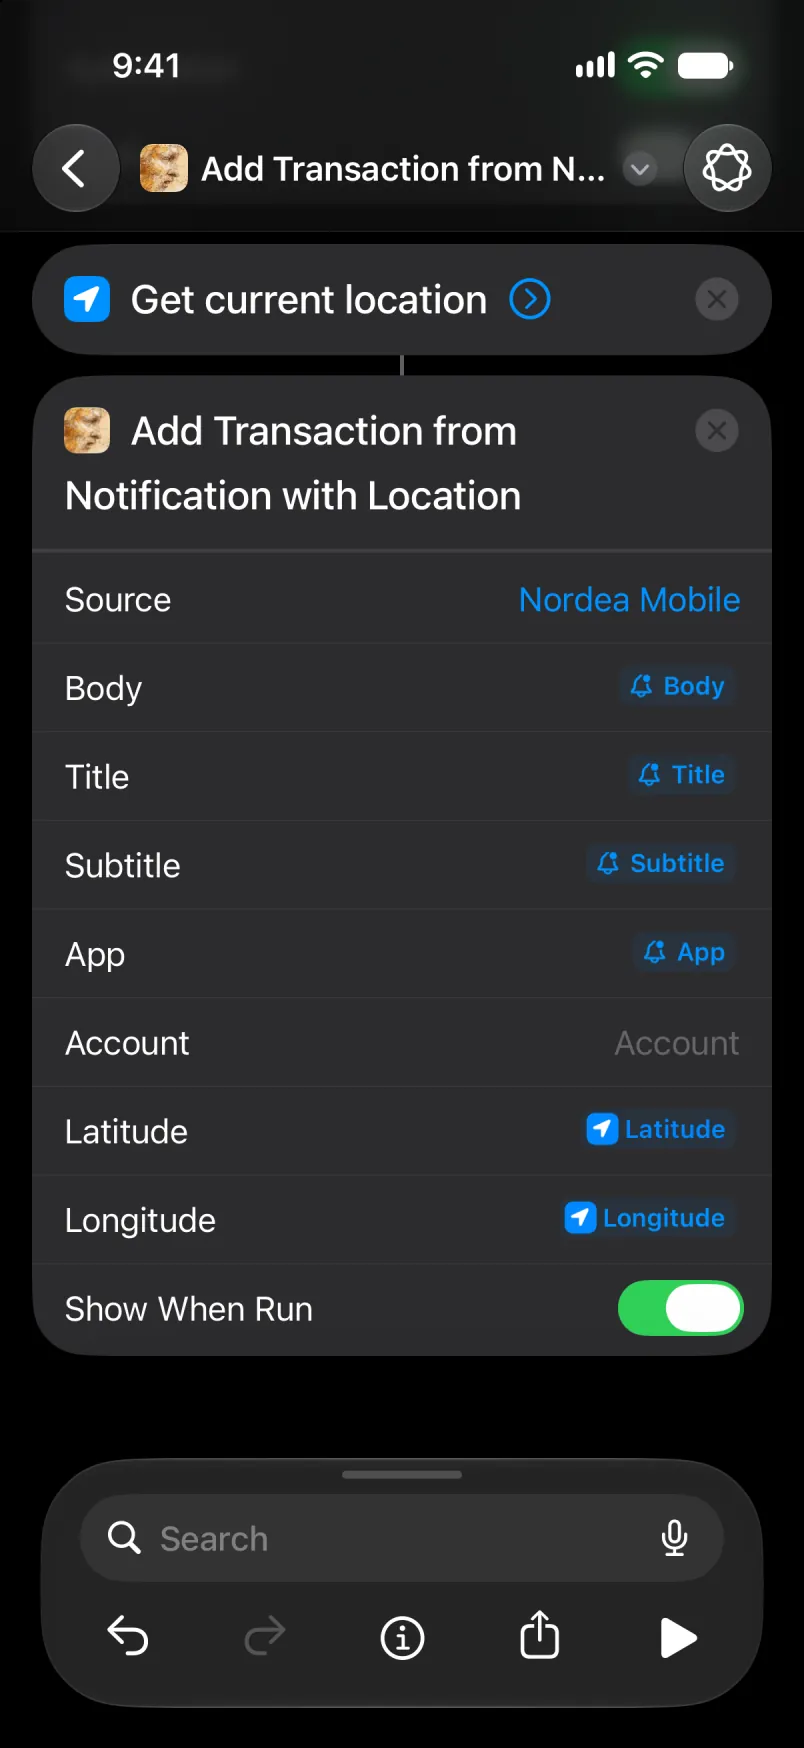
Fill Source, Body, Title, Subtitle and App as above. Latitude and Longitude come from Current Location. Tap the arrow at the top left to save.
The new automation appears in the list, here with all four. Both Nordea automations can stay on.
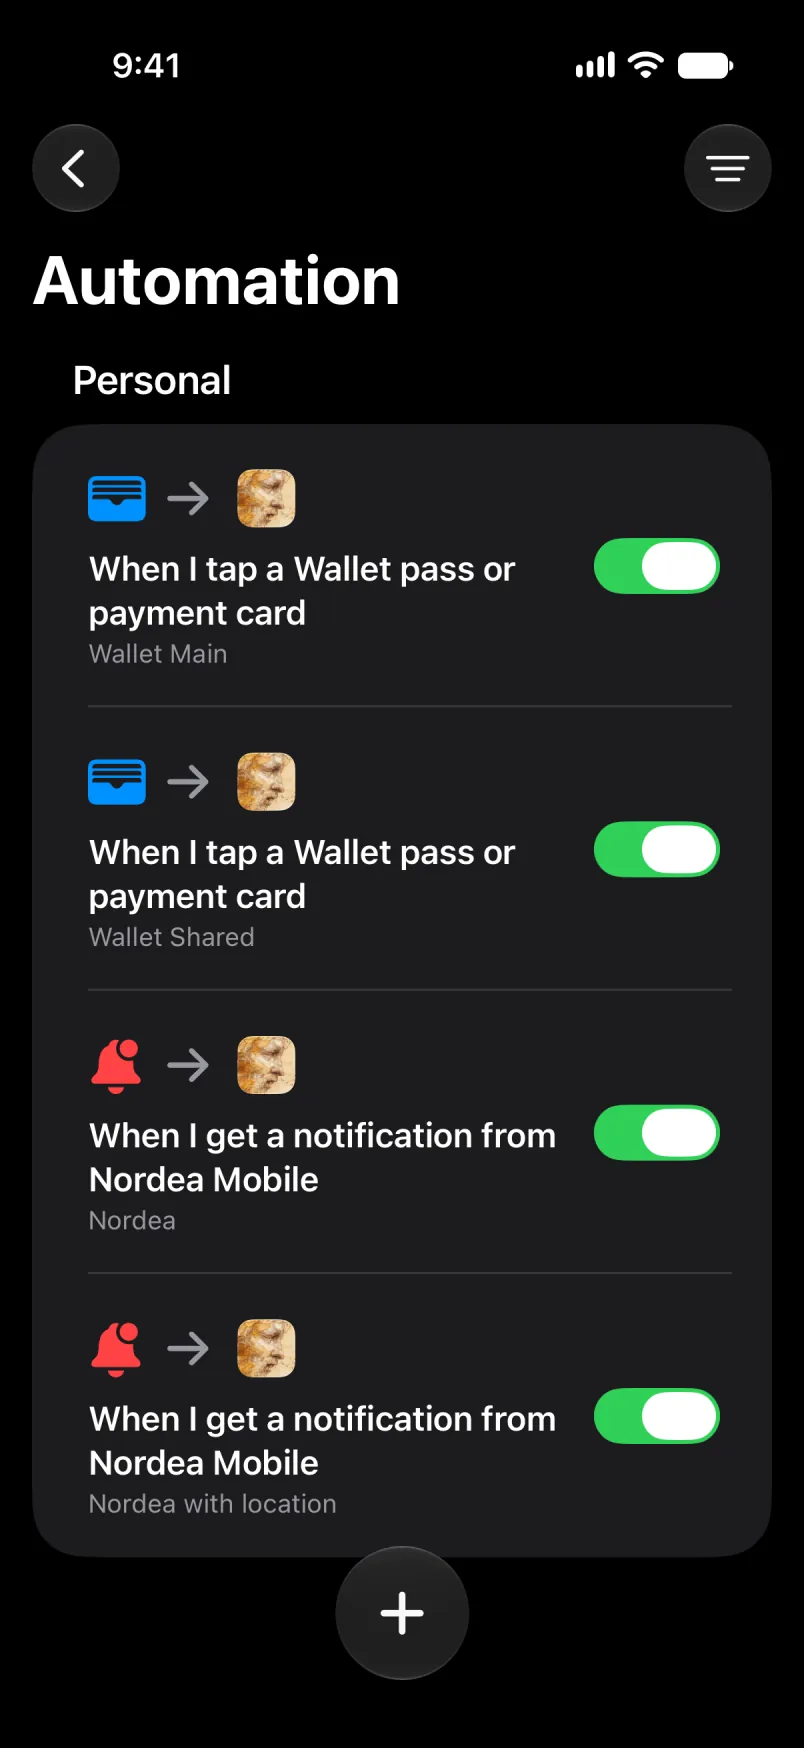
Leave Account empty for your default account, or type the account’s name. For Main and Shared, type the English name, even if your app is in another language. A translated name, such as Primær in Danish, stops matching if you switch the app’s language later: the payment then lands on your default account, with the name under Imported details. An account you made yourself has one name, the one you gave it.
Give both Nordea automations the same Source and the same Account. If they differ, the payment is saved twice, and the app warns you that it may be the same payment. That can also happen if you open the app in the few seconds between the two.
When it works
The banner, as before.
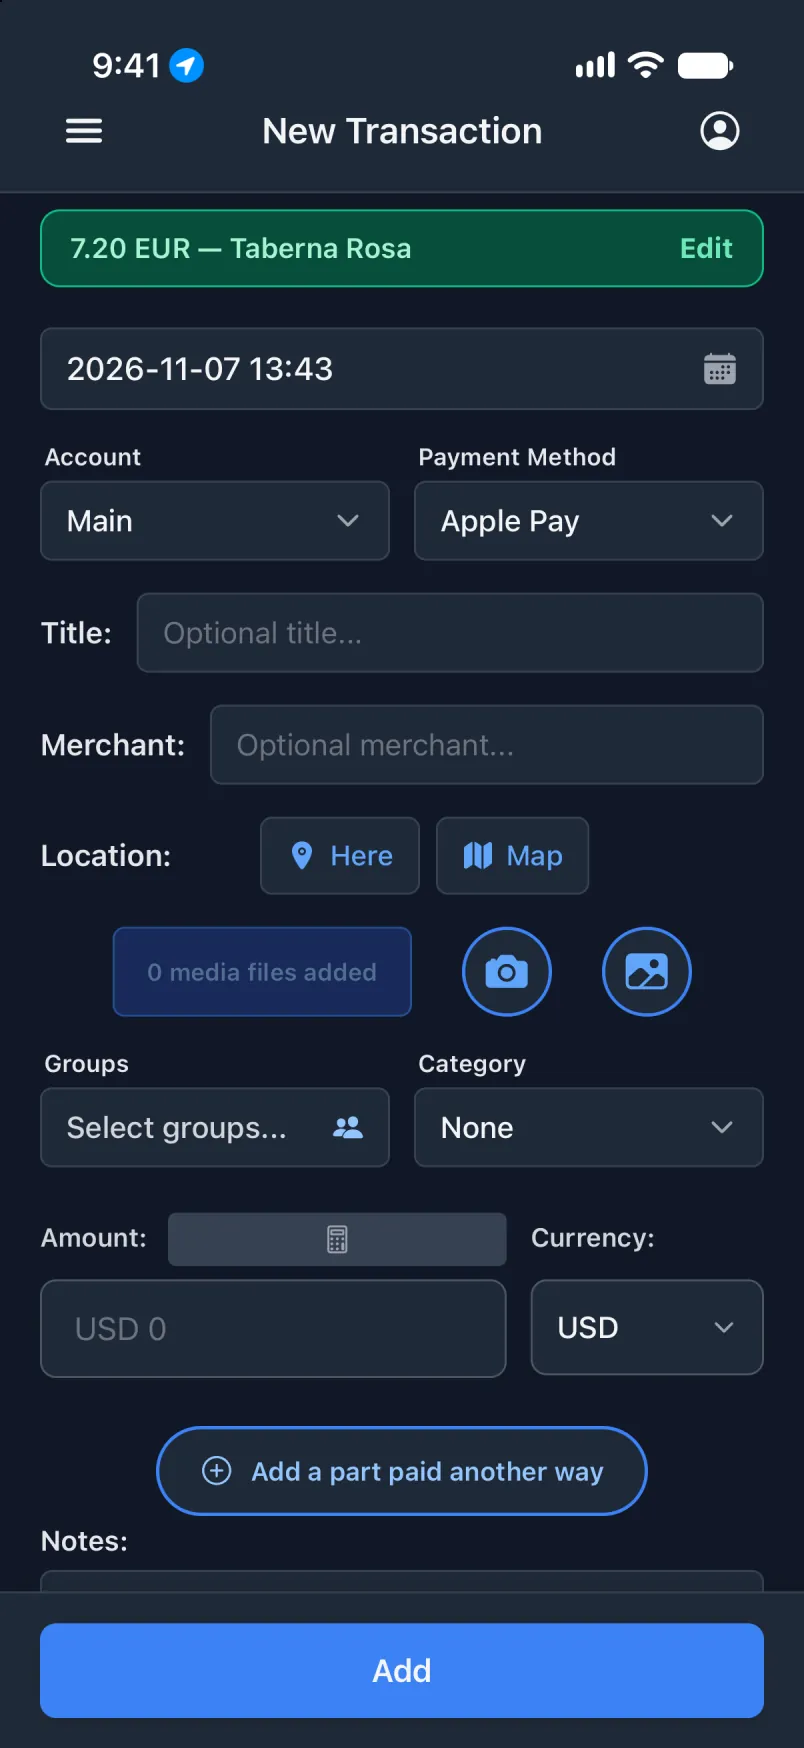
Tap Edit: Location holds the address.